
If you’ve ever walked outside after a good rain only to find your lawn looking more like a shallow swimming pool, you know the frustration of garden drainage issues. It’s demoralizing, it’s wet, and frankly, it can signal bigger problems lurking beneath the surface.
The good news? You don’t need to become a full-time landscaper to manage water runoff effectively. We’re going to explore seven solid garden drainage solutions that homeowners and DIY enthusiasts can tackle. Think of me as that knowledgeable friend showing you the ropes—we’ll keep things friendly, practical, and focused on keeping your foundation dry and your plants happy.
We’ll cover everything from simple fixes, like how to grade your yard for drainage slope, to more robust systems, ensuring you have the right tactics for tackling standing water.
1. Aerating the Soil: Letting Your Garden Breathe
If your soil feels like concrete after a drizzle, chances are compaction is the culprit slowing down all that lovely water absorption. Aerating the soil means creating small holes that let water, air, and nutrients penetrate down to where the roots actually live.
This process is crucial if you’re dealing with heavy clay soil, which naturally resists water movement. You can absolutely handle this yourself! Sometimes a simple garden fork suffices, or perhaps you’ll want to buy or rent a plug aerator for a bigger lawn.
By making sure air can circulate, you actively improve drainage and prevent those frustrating muddy spots where nothing seems to grow well. I always aim to aerate when the grass is active, so it can quickly fill in those holes and bounce back stronger.
2. Grading the Yard: Creating the Essential Slope
One of the most fundamental, yet often overlooked, steps to prevent water pooling around the house is proper yard grading. This is about setting a gentle slope that naturally shepherds water away from your structure.
When you plan how to grade yard for drainage slope, the magic number is a drop of about 1 to 2 inches for every 10 feet away from your foundation. This gradual incline is just enough pitch to guide surface water runoff without making your yard unusable.
Create a slope away from your house, aiming for 1–2 inches per foot to prevent water pooling near your foundation.
When adding soil to fix dips, opt for something dense, like clay-heavy soil, which packs down well and holds that grade. Soft topsoil tends to wash away too quickly once the heavy rains hit.
Take a look around seasonally. Erosion happens, landscaping shifts happen, and that perfect slope can flatten over time. A quick visual inspection can save you from future water woes!
3. Installing a French Drain: The Underground Water Diverter
When aeration and grading aren’t enough to manage high volumes of water, it’s time to look at a more robust system: the French drain installation. This system acts like a hidden underground river, capturing water and moving it exactly where you want it to go.
A French drain relies on a perforated pipe nestled at the bottom of a gravel-filled trench. As water enters the trench, it flows into the pipe and travels downhill to an outlet, effectively solving serious yard drainage solutions.

The French Drain Installation Process Overview
Don’t let the name scare you; understanding the steps helps demystify the project. You start by digging a trench—usually about 18 to 24 inches deep and perhaps 6 inches wide—ensuring it has that necessary downhill slope.
Next, you line the trench with landscape fabric. This fabric acts as a filter, keeping fine soil particles from clogging up your gravel and pipe. The perforated pipe goes in next, with the holes pointed down so water can easily seep in.
Once the pipe is set, you fill the trench with clean, washed gravel (this is what allows the water to flow freely) before folding the fabric over the top. Finally, you top it off with soil.
Cost Considerations for a French Drain DIY
Thinking about the cost to install a French drain DIY? It’s certainly cheaper than hiring a pro, but you still need materials. Generally, materials can run you anywhere from $10 to $100 per linear foot, massively depending on the depth and the cost of gravel/pipe locally.
Remember, this isn’t just about aesthetics—it’s about foundation protection. If you have persistent puddles near your concrete slab, this investment pays huge dividends in avoided water damage claims later on.
Simple French Drain Maintenance Tips
While they are largely set-it-and-forget-it, a little TLC keeps your French drain working hard. Regularly check the outlet point to make sure it isn’t blocked by leaves or sediment. If you notice the area around the drain seems saturated after a light rain, it might mean the gravel or pipe is beginning to clog.
A gently flushing with a hose might clear minor debris, but major blockages usually require digging out and refreshing key sections of the gravel. Keep that slope correct, and your drain will keep performing its duty!
4. Extending Downspouts: Redirecting the Roof Water
Before digging trenches, let’s address the water coming directly off your roof. This is the easiest fix for immediate drainage improvement: extend downspouts.
If your gutters dump right next to your foundation, you are essentially creating a permanent, localized flood zone. You must direct this concentrated water volume much farther away.
I always recommend ensuring downspouts discharge at least 4 to 6 feet away from the home walls. Flexible extensions are great because you can adjust their path seasonally.
Proper Downspout Placement Strategy
When setting up downspout extensions, think about where the water is going. You want it moving away from vulnerable areas and ideally onto turf or garden beds where water runoff absorption can happen naturally.
| Distance from Foundation | Purpose | Additional Tip |
|---|---|---|
| 4-6 feet | Prevents water pooling | Use downspout extensions |
| 6-10 feet | Reduces flooding risk | Consider rain barrels |
| 10+ feet | Directs water away safely | Guarantee proper maintenance |
Remember, this is preventative maintenance. A well-placed extension is much cheaper than repairing a cracked foundation wall!
Flexible Extension Options for Tricky Spots
For yards that aren’t perfectly flat, flexible plastic or aluminum extensions are fantastic. They allow you to snake the water path so it avoids flower beds or patios, steering it toward a designated, low-impact area. Just make sure the material you choose is UV resistant so it doesn’t crack after a summer baking in the sun.
Preventing Water Pooling with Extensions
The primary goal here is eliminating those frustrating puddles right next to your entryway or basement window. Even a mild slope can be overwhelmed if the downspout dumps a large volume of water directly onto it. Always check that the exit end of your extension isn’t creating a new low spot somewhere else in your yard!
5. Using Rain Barrels: Conservation Meets Drainage Control
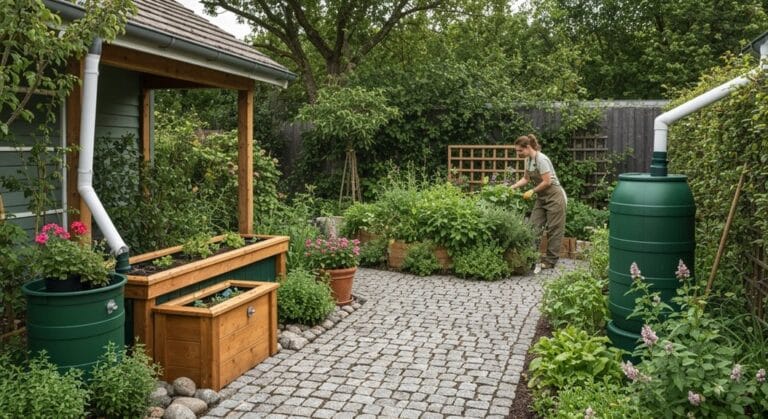
Why waste perfectly good rainwater? Using rain barrels connected to your downspouts is an excellent way to manage overflow while simultaneously collecting water for your garden. This is a fantastic micro-solution for reducing the burden on your overall drainage system.
When it rains, consider capturing that precious water instead of just watching it puddle.
This strategy directly addresses excess runoff during storms, meaning less water is soaking into soggy areas or overwhelming the ground near your house. Plus, it’s an eco-friendly choice that saves you money on your water bills.
Important Note: Before you install a dozen barrels, check local water rights and municipality rules. Some jurisdictions have specific regulations regarding the size or use of rain barrels, even though they are typically for on-site use.
6. Installing a Catch Basin: Targeted Water Collection
If you have one specific low spot where water *always* gathers, installing a catch basin is a smart targeted intervention. This is essentially a grated box buried flush with the ground, connecting to an underground pipe system designed to carry water away.
You position the basin right in the problem area. When water flows into it, the slots prevent large debris (like leaves or sticks) from entering the main drainage line. This keeps the system flowing smoothly.
I found that strategically placing these basins drastically reduced persistent wet spots near my patio. The initial French drain installation cost can be high, but a localized catch basin system is often a much more budget-friendly way to handle a single trouble spot.
7. Creating a Rain Garden: Beautiful Water Absorption
For a solution that is both functional and beautiful, consider rain garden creation. This works best in areas where water naturally drains slowly or collects temporarily. It’s essentially a slightly depressed garden bed designed expressly to hold and slowly absorb stormwater.
A rain garden absorbs excess water and reduces runoff, making it perfect for low-lying areas where water collects.
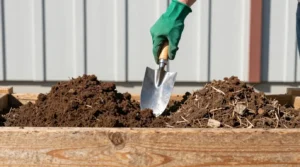
The key here is choosing the right plants—native species that tolerate both wet feet and brief dry spells. Amending the soil with compost and organic matter is vital; this spongy mix encourages healthy infiltration rather than muddy stagnation.
Rain gardens offer fantastic ecological benefits, helping filter pollutants before they hit groundwater and providing habitat for beneficial insects. It’s a true blend of form and function!
Comparative Summary of Drainage Solutions
We’ve covered seven approaches, but which one is right for your specific scenario? Understanding the best drainage solution for sloped yards versus flat, clay-heavy areas helps you prioritize your efforts.
| Solution | Best For | Effort Level | Primary Benefit |
|---|---|---|---|
| Aerating Soil | Compacted Loam/Clay | Low/Medium | Improved soil permeability |
| Grading Yard | General surface runoff | Medium/High | Redirects water away from foundation |
| French Drain | Saturated areas, steep slopes | High (DIY/Pro) | Subsurface water interception |
| Extend Downspouts | Any home with gutters | Low | Prevents direct foundation saturation |
| Rain Barrel | Managing light/moderate rainfall | Low | Water conservation |
| Catch Basin | Specific low spots | Medium | Targeted collection |
| Rain Garden | Areas with slow soak time | Medium/High | Natural absorption and aesthetics |
Frequently Asked Questions
How Do I Fix Poor Drainage in My Garden Quickly?
For a fast fix, start with the easiest steps: aerating the soil deeply in problem areas and ensuring all downspouts are extended at least 6 feet away from your house. If water is collecting, you can temporarily create small surface swales (mini-ditches) to direct flow away while planning a larger fix.
How to Fix a Yard That Holds Water Naturally After Every Rain?
If your yard is perpetually soggy, you’ll need a subsurface solution. I recommend investigating the cost to install a French drain DIY in the wettest zone. For severe issues, combining a French drain with rain garden creation in the overflow area provides comprehensive management.
What Is the Best Drainage Solution for a Sloped Yard?
For a best drainage solution for sloped yard scenarios, the French drain is the champion because it manages gravity-fed water flow efficiently. However, this must work in tandem with ensuring your yard grading slope is working correctly so surface water doesn’t just run right over top of your French drain trenches.
Do Local Regulations Affect My Drainage Choices Like Rain Barrels?
Yes, they absolutely can! While most places encourage water conservation, some municipalities regulate rain barrel size or rainwater harvesting due to fears of creating mosquito breeding grounds or interfering with shared water resources. Always spend five minutes checking your homeowner association rules or local water utility guidelines before setting up collection systems.
Conclusion
We’ve walked through seven excellent strategies for tackling garden drainage issues, transforming your soggy space into a thriving landscape. From the simple act of aerating the soil to the engineering involved in a French drain installation, you now have the tools to manage water wisely.
Don’t let poor drainage dictate the health of your yard or the safety of your home. Start small—maybe just extending those downspouts—and build from there. A little proactive work now ensures your garden stays lush, dry, and beautiful for seasons to come!