


If you’ve ever looked at your potted plants with confusion—wondering why the tomatoes are stunted or the herbs look thirsty every hour—you’re not alone. Container gardening feels simple, but the unique environment of a pot amplifies small mistakes. It’s easy to fall into some common container gardening errors.
But don’t worry! I’m here to help you troubleshoot those pitfalls. Think of me as the friend who’s already killed a few basil plants so you don’t have to. We’re going to cover everything from the right potting mix to watering schedules, ensuring your balcony or patio becomes a thriving green oasis.
The Top Container Gardening Mistakes and How to Fix Them
Most problems boil down to a few critical areas: timing, soil, water, and space. If you get these four things right, you’re probably 80% of the way to success in your container garden.
1. Planting Too Early: Ignoring Seasonal Timing
Ever eagerly planted your summer squash seedlings outside, only to have them look absolutely miserable a week later? That’s usually a sign you planted too soon. Timing is everything when it comes to climate suitability.
Summer crops, like tomatoes and peppers, need reliability—wait until nighttime temperatures are consistently warm before transplanting. For quick-growing greens, use the cooler spring or fall weather. You need to know your local hardiness zone to get this right.
A great resource is your local Cooperative Extension office; they provide detailed, free planting guides specific to your area. Matching the plant to the season saves you time, effort, and the heartbreak of watching struggling seedlings.
2. Using the Wrong Soil (Or Worse, Garden Dirt)
This is perhaps the fastest way to fail. Many people grab dirt from their yard (field dirt) and toss it into a decorative pot. Resist this urge!
Garden soil compacts easily inside a container, suffocating the roots. Roots need air pockets to breathe, which is why you must use a dedicated, light, fluffy potting mix. A good quality mix is designed for aeration and proper moisture retention.
To boost your soil’s performance, consider amending it. A well-draining medium often includes peat moss or coir, plus perlite or vermiculite to enhance aeration. This spongy structure helps prevent the container gardening soil problems that lead to root rot.
3. Deficient Drainage: The Root of All Evil

If your container doesn’t have functional drainage holes, you haven’t built a grow pot; you’ve built a plant bathtub. Water sits at the bottom, oxygen levels drop, and root suffocation turns into root rot almost immediately.
If you discover a pot that lacks holes, you need to fix it immediately. Drill several holes (aim for 1/2 inch to 3/4 inch wide) in the base. If you can’t drill new ones, you must physically tip the pot to drain after heavy rain or overwatering incidents.
- Always confirm drainage holes are present and clear before planting.
- Never prop pots up on saucers unless you empty the standing water within an hour of watering.
- If you must group pots, use pot feet or bricks to elevate them off the surface.
4. Catastrophic Container Garden Watering Mistakes
Container garden watering mistakes are incredibly common because pots dry out much faster than in-ground beds—especially on windy or hot days. You either drown the roots or let them bake dry.
The golden rule for container plant watering is soil assessment, not schedule adherence. Stick your index finger about 1 to 2 inches down into the soil. If it feels dry at that depth, it’s time for a drink.
For deep pots or large veggies, consider investing in a simple moisture meter. This digital tool removes the guesswork entirely. When you do water, water deeply until you see it running out of the drainage holes, ensuring the entire root zone is soaked.
- In summer heat, small pots might need water daily; check them every morning.
- When soil is bone dry, water may run straight down the sides; water slowly until saturation occurs.
- Watering in the early morning is ideal to reduce evaporation loss throughout the day.
If you routinely forget to water or travel often, look into self-watering containers. These are fantastic tools, but you still need to ensure you use the right soil and keep the reservoir functioning correctly.
⚠️ Affiliate Disclosure
This post contains affiliate links, meaning I may earn a commission if you make a purchase through these links, at no additional cost to you. As an Amazon Associate, I earn from qualifying purchases. I only recommend products I genuinely believe will add value.
5. Overcrowding: Ignoring Plant Spacing Guidelines
It feels economical to cram three basil starts into a one-gallon pot, right? Wrong. This leads directly to poor yields, increased disease pressure, and stressed plants fighting for scarce resources.
Good plant spacing guidelines are essential for maximizing air circulation—airflow is your first line of defense against fungal issues and powdery mildew. For medium-sized summer vegetables, aim for at least 12 to 18 inches between plants, or, as a good rule of thumb, use one plant per 5-gallon container for larger crops like a single tomato or zucchini.
- Thin seedlings mercilessly early if they look too close.
- Use stakes or cages to lift sprawling plants upward, improving side-to-side airflow.
- When pairing plants, confirm they have similar water and light needs to avoid root competition.
When roots compete fiercely for limited water and nutrients, you end up with smaller, less productive plants overall. Prioritize soil volume for the roots!
Advanced Fixes for Common Container Woes
How to Improve Drainage in Pots When It’s Just Not Working
We’ve established that drainage holes are non-negotiable. However, sometimes the problem isn’t the hole size; it’s the medium itself or the way the pot sits.
If you suspect poor internal drainage (waterlogged soil persists), the fix is often replacing the potting mix entirely with a lighter blend. For how to improve drainage in pots using a simple technique, always ensure you use pot feet or bricks to lift the container base off the patio or balcony floor, allowing water to escape freely.
| Drainage Issue | Solution |
|---|---|
| Hole is blocked by soil before planting | Place a square of window screen material over the hole when potting. |
| Soil retains too much water | Repot using a mix heavy in perlite or grit for better soil aeration. |
| Using a pot with no overflow saucer | Elevate the pot slightly above the surface it rests on. |
Choosing the Right Container Material for Your Climate
The physical container you select heavily influences how fast the soil dries out and how hot the roots get. This is often overlooked!
Pros and cons of terracotta vs. plastic containers for herbs highlights this perfectly. Terracotta is porous; it looks beautiful, but it wicks moisture out of the soil rapidly, meaning more watering for you—though this is helpful in humid climates.
Plastic weighs less and retains moisture much longer, which is great for drought-tolerant planting. However, dark plastic absorbs tremendous heat, potentially scorching roots during peak summer afternoons. If you use dark plastic, make sure plants get afternoon shade or consider wrapping the exterior with burlap or insulation.
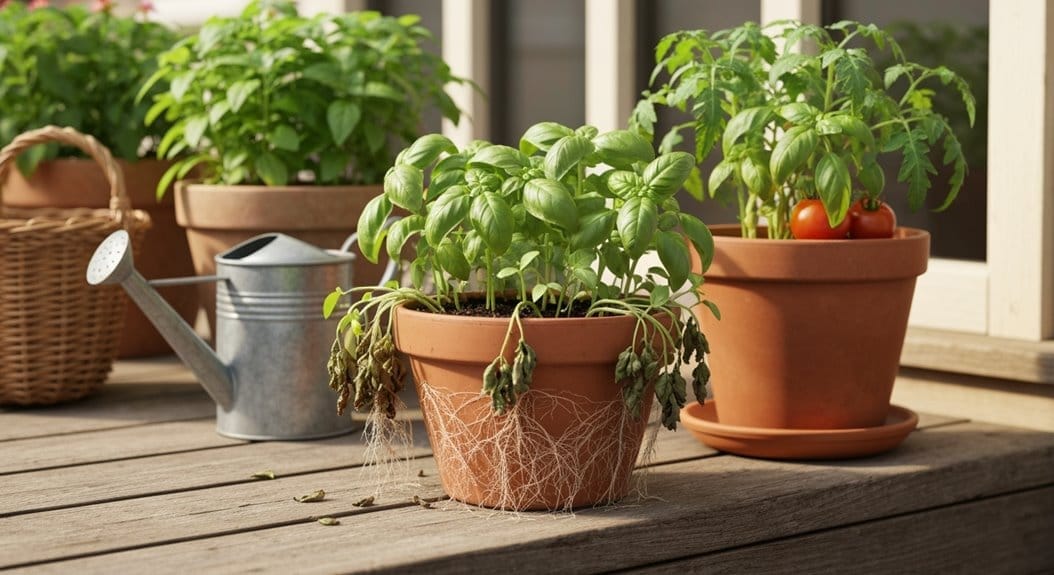
- Terracotta: Dries fast, handles airflow well, fragile.
- Plastic: Retains moisture, lightweight, watch for overheating in dark colors.
- Glazed Ceramic: Behaves like plastic (holds moisture) but is heavier.
- Metal: Can rapidly transfer heat/cold—often best avoided unless heavily insulated or placed in partial sun.
Next-Level Container Care
Integrated Pest Management for Container Vegetables
Pests are inevitable, but they can be managed organically. When plants are stressed from poor watering or crowding, they attract problems more easily. Focus on prevention first, following sound integrated pest management principles.
For organic pest management for container vegetables, inspect the undersides of leaves regularly. If you spot aphids or whiteflies, a sharp spray of water can knock many off. For persistent issues, use insecticidal soap or diluted neem oil, focusing your application in the early morning or late evening.
- Introduce beneficial insects (like ladybugs) if pest pressure is high.
- Remove heavily infested leaves immediately to prevent spread.
- Ensure good air movement to deter fungal issues before they become pest highways.
Establishing a Simple Organic Fertilizer Options for Container Plants Schedule
Since you water frequently, nutrients wash out of potting mix quickly. You need a consistent feeding plan. For beginners, look for a slow-release granular fertilizer mixed into the soil at planting time—this feeds steadily for several months. This is an easy way to provide organic fertilizer options for container plants.
For hungry plants like tomatoes, supplement with a water-soluble liquid fertilizer every two to four weeks once the plant begins flowering. This answers how often to fertilize potted tomatoes: initial slow-release followed by regular liquid feeding.
Companion Planting Strategy for Pots
While we discussed avoiding harmful plant pairings, it’s smart to group beneficial ones! Best companion planting for container gardening often share similar needs and can even deter pests from one another.
For instance, planting basil near tomatoes is a classic pairing that many gardeners believe enhances flavor and deters tomato hornworms. When you group plants, ensure the combined root mass and nutrient draw fits the pot size you’ve chosen; don’t mix a thirsty cucumber with a drought-tolerant rosemary.
How to Winterize Container Plants in Cold Climates
If you live somewhere that dips below freezing, you must plan for your pots’ survival. Leaving a saturated pot outside means the water expands when it freezes, cracking the container and killing the roots.
How to winterize container plants in cold climates involves several steps. First, stop fertilizing a month before the first expected frost. Reduce watering slowly as plants go dormant. For sensitive perennials, wrap the exterior of the pot in burlap or bubble wrap for insulation, or move pots against a sheltered wall.
Plants with shallow roots that are borderline hardy for your zone should be moved into an unheated garage or shed until spring. For very cold zones, consider switching to frost-proof containers like heavy plastic or fiberglass for vulnerable permanent plantings.
Frequently Asked Questions
How often should I repot fast-growing container plants?
You should aim to repot frequently growing plants, like popular herbs or annual flowers, about once a year or whenever you notice the roots circling the inside of the pot, indicating they are becoming root-bound. The best time to do this is usually early spring, allowing you to refresh the soil and increase the pot size slightly.
What size pot do I need for a dwarf basil plant?
For a single dwarf basil plant, starting with a container at least 6 to 8 inches in diameter provides enough soil volume for adequate moisture and nutrient supply. Always check the mature size recommendation on the seed packet or tag, choosing pots that match that width.
How to prevent over-watering in container gardens?
The best way to prevent container garden watering mistakes is diagnostic checking: never water on a strict schedule. Test the top 1–2 inches of soil with your finger or a moisture meter; if it feels damp, wait another day. Ensure every pot has excellent drainage holes.
What are the pros and cons of terracotta vs. plastic containers for herbs?
Terracotta containers look lovely and allow soil to breathe, but they dry out very quickly, needing frequent watering. Plastic containers retain moisture much longer but do not breathe, requiring careful monitoring to avoid soggy soil conditions.
When should I plant summer vegetables in containers in USDA hardiness zone 6?
In USDA hardiness zone 6, you should wait until all danger of frost has passed, typically around Mother’s Day, to plant heat-loving summer vegetables like tomatoes or peppers outdoors in your containers. Cool-season crops can go out much earlier in spring.
Conclusion
Navigating the world of container gardening mistakes might seem daunting, but remember that most issues stem from just a few key areas. Getting the potting mix right, prioritizing drainage holes, and mastering your watering technique are the biggest wins you can secure.
Always remember: container plants rely entirely on you for everything. Give them room with proper plant spacing guidelines, choose a container material that suits heat and moisture, and provide consistent, deep watering when the top inch or two of soil feels dry. Keep these fundamentals in mind, and you’ll be sharing that beautiful patio harvest very soon!


