


The Ultimate Guide to Starting Your First Raised Bed Garden: Quick Wins and Lasting Success
So, you’ve decided to dive into starting a raised bed garden? That’s absolutely fantastic news! It’s genuinely one of the best ways to get incredible harvests without fighting years of rocky soil or battling endless weeds.
Think of me as your experienced friend who has already made all the rookie mistakes, so you don’t have to. The key to truly loving your new garden right away is setting up that perfect foundation and choosing crops that give you speedy results.
We’re going to focus on simplifying the setup, mastering the soil, and picking the right veggies so you see success fast. If you’re ready to maximize your small space for a continuous supply of fresh vegetables, let’s get that perfect raised bed garden setup going!
Planning and Layout Strategies: Picking the Perfect Spot
Before you even think about lumber or hauling soil, you need to scout the perfect piece of real estate in your yard. Almost everything you grow will need serious sun—aim for six to eight hours of direct light daily. Sun is non-negotiable for most vegetables!
Once you select that sunny area, you must completely strip the ground clean. This means removing all existing turf, stubborn roots, and any debris. If you skip this step, guess what happens? Grass and persistent weeds will happily send runners right up through your beautiful new soil mix.
Next, let’s talk dimensions. When planning the structure, I strongly recommend keeping your beds no wider than four feet. Why four feet? Because you need to be able to comfortably reach the center from either side without stepping into the bed. Remember, stepping on your garden soil compacts it—and we want fluffy!
Make sure you leave about two to three feet of walkway between your beds. This spacing is essential if you plan on navigating a wheelbarrow later on, which you definitely will.
After marking your borders, take the time to level the ground precisely. Use a long level to ensure everything sits plumb before construction begins. Then, suppress any weeds underneath those wooden frames using thick layers of brown cardboard or even by letting the spot solarize under black plastic for a few weeks.
A Note on Construction Materials
Since we are tackling how to build a raised bed, the material matters for longevity. Cedar or redwood are fantastic choices because they resist rot naturally, though they cost more upfront. If you are budget-conscious, you can use standard untreated pine, knowing it might only last 3–5 years before needing replacement.
Avoid using old railroad ties or older pressure-treated lumber, as some older treatments can leach chemicals into your growing medium. For a standard 4×8 bed made of nice cedar, I typically budget around $150 to $250 just for the wood and fasteners, depending on current lumber prices.
The Perfect Raised Bed Soil Mix: Filling Your Frame
This is where most beginners get nervous, but creating the right medium is the secret sauce for excellent raised bed gardening for beginners. We are creating the perfect environment from scratch, prioritizing good drainage and excellent soil aeration.
The ideal raised bed soil mix avoids heavy native dirt entirely! We aim for a balanced blend that encourages fluffy roots. A great starting recipe is roughly one-third compost, one-third good quality topsoil, and one-third airy material like peat moss or coconut coir (a great peat alternative).
Start with a light, well-drained mix: about one-third topsoil, one-third compost, one-third peat moss blended with coarse sand or perlite
Don’t forget your final textural component—coarse sand or perlite blended in will ensure water doesn’t linger in the lower layers. It is crucial to test your pH once the soil is in place; peat moss tends to lower pH, so you may need to mix in some garden lime to reach that sweet spot between 6.5 and 7.0.
- Test your soil pH once the mix is in place; peat moss tends to make things acidic, so you might need to adjust to a sweet spot between 6.5 and 7.0.
- If using vermiculite (great for moisture retention), use it sparingly—aiming for just 5–10% by volume.
- Never, ever walk on your filled beds! Keep those 4-foot widths to maintain that fluffy soil structure.
When filling, it’s best to layer these components loosely rather than just dumping them in randomly. This layering technique helps prevent the formation of a “hard pan”—a dense layer that forms when soil settles too quickly and resists water penetration.
Best First Crops for Quick Raised Bed Harvesting
You’ve done the heavy lifting, and now you are itching to plant, right? The path to immediate garden satisfaction is choosing quick, reliable crops. These are your “quick wins.”
Focusing on leafy greens and speedy roots during the cooler early spring season is smart. Think about lettuce, spinach, crisp arugula, Swiss chard, and, my absolute favorite for speed, radishes. Seriously, some radish varieties are ready to eat in as little as 25 days!
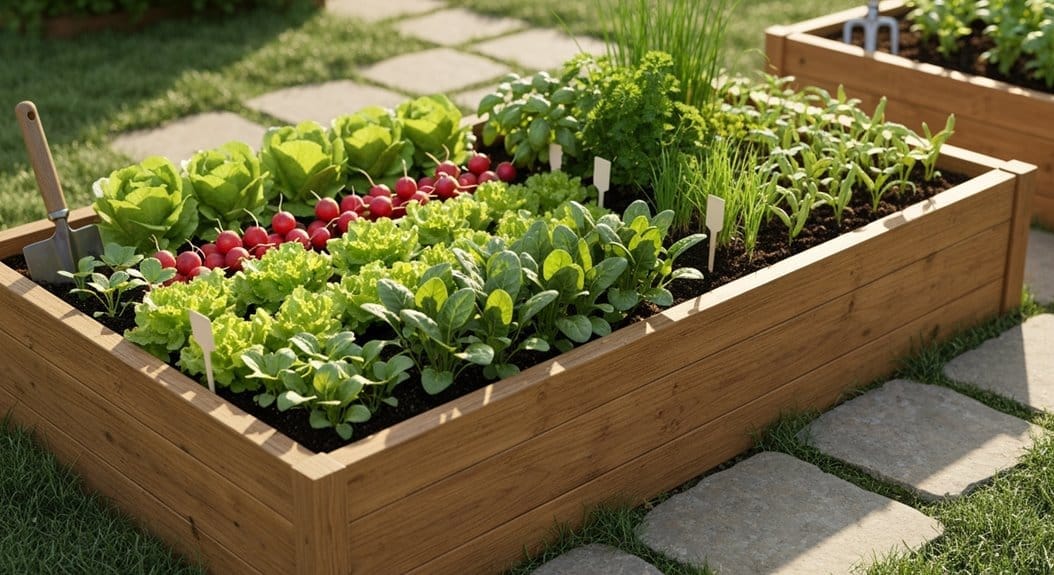
Once the danger of frost has vanished completely, switch gears to warm-season favorites like bush beans, cucumbers, and compact squash varieties. Bush beans are incredibly helpful for new gardeners because many types mature in just 50 to 55 days, giving you a great supply of protein quickly.
For root vegetables, your loose, deep soil is a dream. Carrots and parsnips will grow long and straight without obstruction. Just be sure to select varieties suited for your regional finishing dates.
Using Square Foot Spacing for Optimal Yields
Getting the planting layout right is crucial for healthy airflow and maximizing your production in a small space. This is where we incorporate square foot spacing strategies.
You can visualize your bed already divided into one-foot-by-one-foot squares. The density you plant changes dramatically based on the mature size of the crop. For example, you might fit one large cabbage head per square, but you can easily plant 16 carrots or radishes comfortably within that very same square.
Here’s a crucial layout tip that prevents disappointment: place your tallest crops—like a tomato cage or a trellis—on the north side of the bed. This prevents them from casting long afternoon shadows over your sun-loving, smaller plants.
If you have vining plants, like certain cucumbers or melons, encourage them to trail over the edges of the bed or use a dedicated trellis system. This simple trick frees up valuable real estate right in the center of your grid.
Succession Planting for Continuous Harvests
Is your goal a never-ending salad bar rather than one massive lettuce harvest that you can’t eat in a week? That’s where smart succession planting comes into play.
This technique is simple: you stagger when you sow seeds so that you have a steady stream of food maturing over a longer season. For fast crops like lettuce or radishes, try sowing a small batch of seeds every 10 to 14 days.

When your cool-season crops inevitably bolt (go to seed) as the summer heat hits, pull them out immediately. Don’t waste that prime real estate! Amend that soil patch with a few scoops of fresh compost and immediately plant your next round of warm-season crops there.
You can also maximize space by interplanting quicker, smaller herbs like basil or dill right underneath the slightly later-maturing, taller crops, like beans. This utilizes every single square inch of the excellent growing medium you’ve prepared.
| Crop | Timing (Approx.) | Role in Rotation |
|---|---|---|
| Lettuce | Sow every 10–14 days | Continuous greens |
| Bush Beans | After first frost | Reliable protein source |
Frequently Asked Questions About Raised Bed Success
What is the ultimate guide to starting a raised bed garden focused on soil prep?
The most crucial step is ensuring excellent materials. Fill your bed with a 1/3 compost, 1/3 topsoil, and 1/3 aeration material blend. Once filled, water deeply for the first week to let everything settle, and then focus on adding slow-release organic fertilizers before planting your main crops.
What are the best first crops for raised beds that mature quickly?
For those guaranteed early wins, stick to radishes (ready in less than a month!), spinach, loose-leaf lettuce, and carrots. These establish quickly, prove the success of your soil, and get you picking fresh food faster than almost anything else.
How often should I water a new raised bed during establishment?
When the soil is brand new, you must be vigilant. Water daily for the first week or two while seeds or transplants settle in. After that, check the moisture level with your finger; if the top inch feels dry, water deeply. This usually settles down to every other day, then perhaps just once or twice a week once the plants are established.
What organic pest controls work best for raised beds?
Effective organic pest control starts with prevention. Companion planting is a great strategy to naturally repel or confuse common pests. Beyond that, focus on attracting beneficial insects, hand-picking larger bugs if you spot them, using physical barriers like temporary row covers early on, and keeping organic sprays like neem oil on hand for small outbreaks.
When and how do I fertilize throughout the first season?
Since raised beds use fine materials that nutrients flush out of faster than ground soil, feeding is essential. Apply a balanced organic fertilizer about two weeks before your first major planting. Then, plan to feed again midway through the season, especially when heavy feeders like squash begin setting fruit. Pro Tip: Always water well before and immediately after fertilizing.
Conclusion
You’ve done the hard foundational work: you selected the sunny spot, planned your layout, and mixed up that perfect growing medium. Now comes the exciting part—planting your initial, fast-growing crops!
Remember, a successful raised bed garden setup is much like running a small, efficient farm; it thrives with consistent compost amendments and mindful care. By starting small with quick greens and hardy herbs, you build gardening confidence rapidly.
Don’t strive for instant perfection; you will learn volumes just by observing your plants daily. Enjoy the quiet, rewarding process of tending your little patch of earth!


