


If you’re looking to get a jump start on your garden harvests, or squeeze in a few extra weeks of cool-season crops before the first hard frost, you’ve come to the right place. We’re rolling up our sleeves to talk about one of the most practical, low-cost tools in season extension: the low tunnel.
Often called a low‑hoop house, this setup isn’t complex. You can master DIY low tunnel construction in about 30 minutes, even if you’re just using basic materials. We’re talking simple hoops (PVC or EMT), a trusty row cover, and a bit of anchor weight. It’s the perfect technique for small-scale growers, community garden coordinators, or homesteaders who need fast, reliable frost protection.
By mastering how to build a low tunnel sturdy enough to handle a bit of weather, you can significantly boost your yields and push your planting windows. Let’s walk through the setup, from choosing a sunny spot to managing ventilation on those unexpectedly warm spring days.
Key Takeaways for a Speedy Low Tunnel Build
- Gather pre-cut hoops (PVC or EMT), baseboards, end posts, plastic or fabric cover, clamps, and anchors before starting.
- Lay out and mark the row, align baseboards, and install end posts at each tunnel end for quick anchoring.
- Slide or snap pre-bent hoops over end posts at 3–4 ft spacing, pushing hoops 6–12 inches into the soil.
- Pull cover taut over hoops, secure it with spring clips or conduit clamps, and weigh or bury edges to stop flapping.
- Add roll-up sides or vent clips for daily airflow, check tension, and re-tighten after windy days.
Recommended Low Tunnel Materials & Tools
⚠️ Affiliate Disclosure
This post contains affiliate links, meaning I may earn a commission if you make a purchase through these links, at no additional cost to you. As an Amazon Associate, I earn from qualifying purchases. I only recommend products I genuinely believe will add value.
Why Low Tunnels Are Worth Your Time for Season Extension
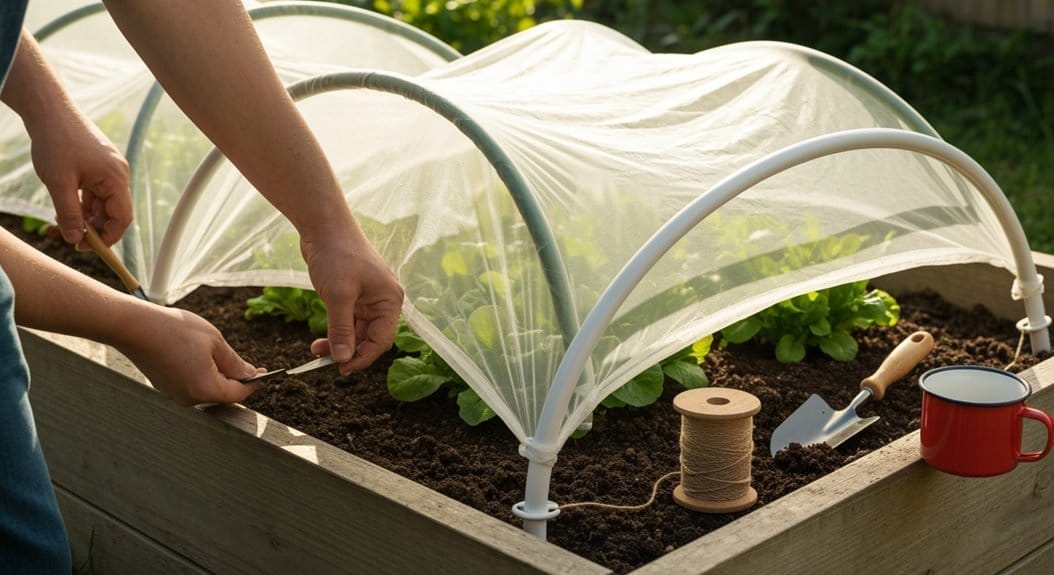
So, why bother with a simple hoop house frame? Because low tunnels let you squeeze more productivity out of the square footage you already have. You boost nutrient and water efficiency, which is crucial when you’re working with limited resources.
In fact, by protecting plants from harsh weather, you can cut irrigation needs by a good 24–40%. That efficiency translates directly into higher yields per unit of fertilizer used. For market growers or community programs, consistent, early-season produce leads to reliable supply and stronger customer relationships.
The main draw, though, is obvious: low tunnels extend your production seasons. You can plant earlier in the spring and continue harvesting cool-season veggies later into the fall, capturing those valuable weeks just outside the normal growing window.
Quick Overview of Low Tunnel Benefits
If you can imagine having a tiny, weather-buffered supermarket right in your garden plot, that’s what a low tunnel feels like. You get earlier harvests and significantly faster leafy growth.
These simple structures offer fantastic frost protection, shield crops from heavy rain, and reduce fungal diseases simply by keeping leaves dry. Plus, they are affordable and quick to set up. You can even swap out plastic covers for lighter fabric based on immediate pest pressure or sun intensity.
Soil health also gets a boost underneath. You’ll see less erosion, better moisture balance, and reduced water waste. Using materials like PVC or galvanized conduit keeps construction fast and affordable, giving you a reliable hoop structure foundation.
Choosing the Right Spot for Your Tunnel

Picking the perfect spot is half the battle, and it mostly comes down to three things: sun, soil, and shelter. Scout for well-drained, fertile ground. If you haven’t already, test your soil chemistry (pH and nutrients) and amend thoroughly before you start building.
Maximize solar gain by placing tunnels where they receive full sun all day—think south-facing in the Northern Hemisphere. You should also actively shelter the tunnel from prevailing winds, perhaps using existing hedges or quick windbreaks if your location is exposed.
Remember to consider access to water for easy irrigation practices. You want the structure to be near your water source and storage so maintenance and daily venting aren’t a hassle.
How to Measure and Plan Your Row
Before you start bending materials, you need a clear plan. Grab a tape measure and determine the desired length of your row—anywhere from 8 to 30 feet usually works well, depending on your space constraints and access needs for harvesting.
Next, decide on the width. For standard leafy greens, 3 to 4 feet is ideal. If you are pushing the limits and growing vining crops like peppers, you might need closer to 6 feet, but sturdier hoops are required for that span. Width also dictates the size of the row cover material you’ll need to purchase.
Finally, mark out your hoop spacing along the row. A general rule of thumb is every 3 to 5 feet; if you live somewhere prone to heavy snow or strong winds, you’ll want them closer together to keep the plastic tight.
Measure Row Length
Getting the row length right ensures you ordered the correct amount of cover material. You can measure precisely with a tape measure or use a marked string that corresponds to the spacing recommended on your seed packets.
- Measure with a tape for precision — or use colored-string segments (2′ or your packet spacing) for repeatable spacing.
- Calculate length: multiply number of plants by recommended spacing; adjust for growth habit (tighter for scallions, wider for lettuce). For most beds, aim for even crop spacing.
- Mark stakes every few feet for access, irrigation planning, and visual consistency; use a laser measurer for large beds.
Measure twice, plan spacing based on maturity, and make sure the rows remain reachable so you can consistently perform necessary maintenance.
Determine Row Width
A low tunnel needs to fit your bed perfectly while leaving enough edge for secure anchoring. Most growers find 3 to 4 feet (about 0.9 to 1.2 meters) works best for general crops, allowing good air circulation.
Crucially, you must account for the overhang needed to anchor the edges. Always plan for at least 12 inches (30 cm) of extra material on each side, which you will secure using soil or sandbags. This prevents wind uplift and soil erosion right where the cover meets the ground.
- 3–4 ft standard
- 6 ft for vines
- +12″ overhang
- match cover roll
- anchor well
A well-designed low tunnel structure not only protects your crops but also helps preserve and improve underlying soil condition.
Plan Hoop Spacing
Once you know the length and width, you need to decide where those hoops go. Their spacing determines how taut your cover stays and how well the tunnel handles weather stress.
In mild climates using lightweight fabric, you can space hoops wider, perhaps 4 to 5 feet apart. However, if you anticipate heavy snow loads or face relentless wind, you should tighten that spacing significantly, maybe even down to 2 feet apart.
- Measure the row length, mark positions with string or stakes, and space hoops uniformly.
- Pre-cut and mark conduit; bend consistent arches (a bending jig or hot water helps).
- Anchor end stakes, double-check intervals, and record layout for future builds.
Uniform spacing equals a longer-lasting structure, easier access for maintenance, and far fewer surprises when a storm blows through.
Selecting Hoop Materials: Wire, PVC, or Metal
Choosing your hoop material involves balancing cost against long-term durability. While aesthetics might seem minor, consider noise—metal hoops can clank in the wind, while PVC or wire stays quieter in the garden setting.
Wire: This is usually the cheapest and lightest option. It bends easily by hand, making it great for quick, short-term season extension. However, wire needs reinforcement (like a center rib) if you want it to last more than a season or two.
Wire hoops: cheapest and lightweight, easy to bend by hand—best for short-term or spare beds; reinforce for a few seasons.
PVC: This is a favorite for the budget-conscious DIY builder. It’s flexible, affordable, and snaps into place easily. Plan for 3 to 6-foot spacing, and be sure to push the ends 4 to 6 inches securely into the soil. You might want connectors to prevent sagging on wider runs.
Metal (EMT): Electrical Metal Tubing, or EMT conduit, is the heavy hitter here. It’s the strongest, lasts the longest, but requires a dedicated conduit bender and higher initial cost. For maximum stability on long runs, burying the ends 5 to 6 inches and adding a top stabilization rail are highly recommended.
- Budget vs. longevity trade-off.
- Reinforce light hoops.
- Spacing affects stability.
- Stake every hoop.
- Choose quiet materials for calm gardens.
Picking the Best Cover: Fabric vs. Plastic

When it comes to the material draped over your frame, you need to weigh temperature control, pest exclusion, and reusability. This choice dictates much of your daily maintenance.
Row cover fabric (like spun-bonded polypropylene) provides gentler warmth (usually 2–6°F) and offers excellent breathability, which naturally manages pests and reduces humidity issues. It’s also lighter and usually reusable for many seasons.
Plastic sheeting, on the other hand, gives you much stronger frost protection (8–10°F). The trade-off? Plastic is impermeable, so you must ventilate aggressively to avoid overheating, condensation, and potential fungal issues.
The bottom line: choose fabric for easier handling, built-in pest control, and long-term reusability. Choose plastic only when you absolutely need that extra degree of frost defense, knowing you’ll have to manage vents closely.
Temperature Control Differences
Plastic is a superior heat trapper—it can raise ambient temperatures by a significant 6°F up to 30°F depending on the day. This means your management strategy must change completely depending on what you cover it with. Fabric offers a milder, more consistent boost.
- Use roll-up sides or vents with plastic anytime the air outside tops 55°F (13°C) to prevent midday scorch.
- If using fabric, you can often layer pieces for extra frost guard without totally sacrificing breathability.
- Consider IR-blocking plastics if you need maximum morning warming, as they retain radiated heat better overnight.
Essentially, you must vent plastics aggressively, but you can favor fabric when you need gentler protection and consistent airflow.
Pest and Disease Protection
Keeping your crops safe from pests without creating a sweaty, disease-prone environment is easier if you choose your cover wisely. Fabric barriers work wonders against common pests like flea beetles while still allowing crucial airflow and moisture exchange.
Plastic keeps insects out only if it is sealed perfectly—but that same seal traps moisture. If you use plastic frequently, you risk condensation leading to fungal issues unless you open the sides daily.
- Use fabric for its superior airflow and reliable insect barrier, which lowers fungal risk.
- If using plastic, open the sides or poke strategically placed slits daily to allow condensation to escape.
- Keep a small, inexpensive humidity gauge inside the tunnel to monitor conditions objectively.
The takeaway here is clarity: choose fabric for balanced, low-maintenance protection; reserve plastic for nights when hard frost is the primary threat.
Durability and Reusability
If you want that cover to last multiple seasons and save you money year over year, woven plastic options are tougher than thin, untreated sheets, but even they break down under UV exposure.
Woven spun-bond fabric generally resists UV degradation and tearing better, often outlasting plastic if handled with care. For multi-year reuse, fabric wins out, provided you take a moment to store it out of the harsh sun during the off-season.
- Choose stronger woven plastic when you need higher heat retention (+8–10°F) but accept that you might replace it every couple of years.
- Choose fabric for breathability, rain permeability, and longevity—it’s often better for community projects requiring less intensive caretaker input.
- Remember that plastic requires diligent venting to avoid condensation and subsequent disease; fabric needs less fuss.
In short: fabric means long-term lower yearly cost; plastic means more immediate heat but demands more attentive maintenance.
Tools and Supplies You’ll Need
Don’t start bending hoops until you have everything staged! Gathering your low tunnel materials list upfront saves you time, significant frustration, and perhaps a few minor disagreements with your build crew later.
For the frame, you’ll want 1/2-inch PVC (315 PSI schedule is recommended for strength) or EMT conduit. You’ll need 9-gauge wire, rebar stakes (about 24 inches long), some shape-holding fittings, and potentially PVC cement if you are creating rigid elements.
Before cutting pipe, gather PVC or EMT, stakes, fittings, primer and tools — saves time, frustration, and swear words.
For covers, decide between spun-bonded row cover, Agribon frost cloth, or UV-resistant clear plastic (see our earlier discussion on which is right for you). For securing the cover, have spring clips, bricks, sandbags, and maybe some wiggle wire and channel ready if you are building a higher-end system.
Finally, for tools: tape measure, hacksaw or pipe cutter, basic clamps, a drill (if using EMT fittings), and a funnel or pot might be useful for softening PVC for bends.
Preparing the Soil and Planting Bed
Before you install a single hoop, clear the planting bed completely of debris, rocks, and especially weeds. Anything sharp or bulky sitting beneath where the plastic will lie risks puncturing your cover or creating an uneven surface that causes sagging.
Improving drainage is essential. If you have heavy clay, adding 2 to 3 inches of high-quality compost or aged manure helps bulk up the soil structure. If water pooling is a consistent issue, consider building a permanent raised bed structure first.
Use a rake to lightly firm and level the final surface. A smooth bed ensures your hoops sit evenly and that water won’t pool in dips beneath the cover.
Clear Debris and Weeds
Weeds are your enemy when building a low tunnel; they steal nutrients, and you don’t want any large roots underneath that could puncture the delicate plastic or fabric.
- Pull weeds by the roots (perennials need root removal) to win the war before planting.
- Rake gently to remove small litter; smooth soil for even hoop placement.
- Compost clean organic debris; discard non-compostables properly.
Take the time for thorough clearing now, and you save yourself from fighting pests or snagging the cover later.
Improve Soil Drainage
Even with good sun, poor drainage leads to root rot, which is disastrous in a semi-enclosed environment. You need to ensure water moves away from the plant base.
- Dig shallow functional ditches or small canals to divert surface water away from the low-lying bed area.
- For heavy clay, incorporate significant organic matter—2–3 inches of compost—to change soil texture over time.
- If standing water persists, the surest fix is to build a raised bed at least 12 inches high.
Always loosen the soil deeply—8 to 12 inches—with a broadfork or spade, avoiding heavy machinery that compacts the structure.
Pre-Fertilize and Level
Starting your low tunnel with nutrient-rich, level soil sets you up for success. Soil testing is the best guide here; it tells you precisely what amendments, like lime or sulfur, are needed for pH balance.
- Test & plan: Collect samples, get lab results, calculate fertilizer amounts based on upcoming crops.
- Prep bed: Loosen 6–8 inches, then thoroughly mix in compost and any slow-release fertilizers.
- Level & smooth: Rake the surface completely flat or form a very slight crown to guarantee water runs off evenly.
A little work here ensures the greenhouse effect under your cover is productive, not stressful, for your plants.
Spacing and Height Guidelines for Hoops
The stability of your entire structure relies on how well you space and size your hoops. Generally, a 4 to 5-foot spacing between hoops is fine for standard, non-aggressive covers.
However, if you live where snow or intense wind is common, you must reduce that gap to 2 to 4 feet. For height, aim for about 2 to 3 feet of clear height above the bed surface. Taller for things like eggplants, shorter for heads of lettuce near the ground.
Remember, the material you choose impacts this. Thicker EMT allows for slightly wider spans than light wire, but it costs more. Always favor closer spacing and stronger anchoring in windy sites.
Building the Hoop Frame Step by Step
For the classic, quick-build low tunnel hoop frame PVC setup, aim for 3/4-inch PVC, paired with 18-inch rebar stakes driven into the ground. PVC is naturally bendy, but using a bit of hot water or a specialized jig ensures you get smooth, uniform arches rather than sharp kinks.
Aim for your hoops to peak at a height suitable for your crop—perhaps 18 inches high for spinach, or 30 inches for developing greens. Keep the spacing consistent, around 4 to 5 feet, so the cover stays tight.
- Measure the row length, mark positions with string or stakes, and space hoops uniformly.
- Pre-cut and mark conduit; bend consistent arches (a bending jig or hot water helps).
- Anchor end stakes, double-check intervals, and record layout for future builds.
Anchoring is critical: drive your rebar stakes at a slight angle (35–45 degrees) toward the center of the bed. This locks the base of the hoop against the soil, preventing a stiff breeze from lifting the whole assembly.
Choose Hoop Materials
When weighing low tunnel hoop frame PVC vs EMT, think about how long you need this tunnel to last. Are you setting it up for one short season, or three?
- EMT (electrical metal tubing) — sturdy, long‑lasting, pricier up front but economical over time; needs a conduit bender.
- 1/2″ PVC conduit — light, easy to cut/bend, great for quick builds and volunteers; reheating helps shaping.
- 9‑gauge wire — very flexible and cheap, best for lightweight row covers or short seasons.
If fast setup is your priority today, PVC is your friend. If you need something to survive heavy snow and come back next year with minimal fuss, EMT is a better investment.
Space and Height
To ensure happy plants and easy access for you, the height and width must match your crop needs. Leafy greens rarely need more than 3 to 4 feet of vertical clearance, while small fruiting plants can tolerate a bit more.
For spacing hoops, 3 to 4 feet apart is a good balance between support and material use, assuming you are dealing with typical weather. If you use wider spans, make sure your cover material isn’t pulling down heavily between supports.
Takeaway: pick height by crop, match uprights to hoops, space hoops 3–4 ft, and keep coverings’ load in mind.
Remember to allow 2×4 or 2×6 lumber bases if you are building a very rigid, permanent end-wall system, as these provide excellent support anchors for your arches.
Anchor and Secure
This step is non-negotiable: if you skip robust anchoring, the next stiff wind turns your investment into debris. For a standard PVC setup, use 18-inch rebar stakes driven deep into the ground at opposing angles.
- Space hoops ~5 ft apart; paint or flag rebar tips for safety.
- Use bungee cords and sandbags to anchor plastic edges; leave ventilation access.
- Add cross braces if wind load seems risky.
Making sure every hoop is locked down reliably ensures you have a sturdy frame for your cover and easy access when you need to get in to harvest.
Securing Hoops for Wind and Weather
When we talk about sturdiness, how you secure those hoops to the ground is the single most important factor resisting wind uplift. You’ll want to embed the ends of your hoops—whether they are rebar-sleeved PVC or solid EMT—at least 3 to 6 inches deep into the soil.
If your ground is compacted clay, take the time to pre-pound the holes for the stakes. This small effort prevents snapped PVC or bent stakes later on. In areas known for high winds, reduce the recommended 18-to-24-inch hoop spacing by about a quarter.
- 3–6″ embed depth
- 18–24″ spacing
- 2′ end stakes
- use durable hoop material
- clamp + weight edges
Once the frame is set, clamp your cover material tightly to the hoops. Use sandbags or landscaping timbers to weigh down the edges where you don’t have soil burial. Pleat any excess material neatly to prevent it from flapping, which rapidly accelerates cover wear.
Installing the Cover Quickly and Neatly
The goal here is to pull the cover taut without creating hard wrinkles that become weak points later. Start by securing the cover firmly down one entire side—whether you are using bricks, heavy objects, or stakes placed every two feet.
Once one side is set at the ground level, move to the opposite side. Pull the cover as tightly as you comfortably can across the ridge, then begin securing that second side. If you have a seam down the middle, clip that spine first to establish alignment.
Smooth Wrinkle-Free Cover
A wrinkled cover is an invitation for rips, as moving air catches the loose fabric easily. To avoid that lumpy mattress look, find the natural center crease of your roll (if possible) and clip it directly over the apex of the center-most hoop.
- Center first
- Alternate sides to keep tension balanced
- Clip straight sections of conduit securely
- Weight down all edges
- Re-tension the entire cover after the first windy day
Use securing hardware (like spring clips) only on the straight, horizontal runs of the hoops, not on the tight bends, where clamping can cause stress fractures.
Anchoring Edges to Prevent Lift-Off
Wind lift is the main structural threat to any low tunnel. To combat this effectively, you need multiple layers of defense at ground level.
- Choose anchors: Use heavy rebar stakes driven deep, or commercial ground anchors for areas with loose or sandy soil.
- Secure cover: Use specialized garden clips or sturdy snap clamps right onto the hoop structure, ensuring the cover can’t pull out.
- Tension system: For very long rows, installing a temporary or permanent ridge pole across the top, tied down with cords, helps pull the cover extremely taut.
Burying the final 6 to 12 inches of the edge fabric under amended soil is the best defense against sustained heavy winds.
Creating Easy Access Points and Doors
Think about where you’ll be working most often. For narrow, 3-foot tunnels, a simple, centered flap that opens easily is great. For wider beds (like 6 feet), you might need openings positioned on the sides near your main working paths.
The simplest access point involves using overlapping flaps made from the same plastic or fabric. You secure these flaps using Velcro, magnets, or even just overlapping fabric weighted heavily.
- Plan locations up front during the initial layout phase.
- Use flexible materials like Velcro or heavy-duty snaps for tool-free opening.
- Reinforce the edges of the access points heavily to prevent tearing.
- Make sure doors are marked visibly, especially if you use opaque covers.
- Check seals regularly for small gaps that pests might exploit.
These access points should be wide enough—aim for at least 2 feet—to easily pass harvest baskets through.
Ventilation Strategies for Warm Days
This is where many new growers run into trouble: warm, sunny spring days can quickly turn a perfect 65°F tunnel interior into a 95°F steam bath, leading to plant stress. You must vent!
For routine daily work, simply roll up the side covering 4 to 6 inches, or more if the sun is intense. If you installed roll-up sides (which we highly recommend), this is a quick, one-handed job.
Roll-Up Sides
Roll-up sides are your primary tool for passive ventilation. They are easy to install, require no power, and allow you to balance humidity and temperature perfectly.
- Install these robust sidewall rolls using hardware that resists corrosion from ground moisture or fertilizers.
- Start by opening them just a few inches—you’re aiming to regulate, not blast the plants with cold air.
- Secure the rolled-up fabric at the top using clamps or heavy ties to keep it out of the way of wind.
When setting up, test the craning mechanism or handle daily; you want smooth operation so volunteers use it consistently.
End-Of-Day Vents
Even after closing the sides for the night, the ground can hold heat. To avoid a slow cooking effect, create a ‘chimney’ right before sunset.
Partially lower one side and leave the opposing side slightly elevated. This creates an upward draft that helps evacuate that trapped hot air before the temperature drops too low for comfort.
Takeaways: vent early in the day as soon as sun hits, use light plastic if heat is a major concern, anchor the frame well, and actively monitor soil temps during intense heat spikes.
Managing Temperature and Humidity
Keeping conditions stable inside means active management, not just passive covering. You need to intercept temperature swings before they stress the crops, which benefits both you and the people you are growing for.
- Install passive vents, perhaps even solar openers, to automate basic airflow when you can’t be there.
- Use thermal mass—like black-painted water jugs placed inside—to absorb sun during the day and slowly release warmth at night, buffering against sudden drops.
- On humid days, even with venting, consider running a small fan near the soil level just to keep air moving and reduce surface moisture.
The key is gentle, consistent air movement. Check morning temperatures daily; this simple routine tells you if you need to adjust your cover strategy.
Pest Prevention Without Chemicals
Effective pest prevention without chemicals starts with physical exclusion. If you are worried about moths or jumping insects, the best strategy is high-quality insect netting, like 30-mesh, placed over the frame *before* the pest emerges en masse.
Remember that netting excludes everything, including beneficial insects like pollinators and predatory wasps. Therefore, it pairs best with crops that don’t require heavy pollination.
For high-value crops that need pollination, use netting only during peak pest pressure times, and coordinate its use with timely releases of beneficial insects or manual pollination when necessary.
When to Remove or Open Covers for Pollination
When your flowering crops—like squash, cucumbers, or melons—begin to set blossoms, you must open the low tunnel to allow access for bees, flies, or other natural pollinators.
You don’t want to shock the plants, so start opening progressively a few days before peak bloom. Crack a small vent first, and then fully open the ends or sides when the weather is calm and warm enough to encourage insect activity.
When to Open Covers
Timing your full opening needs to align with bloom period and weather stability. A perfect low tunnel for tomatoes might need different timing than one for lettuce!
- Start with a small vent 2–3 days before flowering begins to acclimate the plants.
- Widen vents or open ends once you see consistent flower opening activity.
- If you are growing greens, keep the covers on until the risk of frost is completely gone.
If you are paranoid about losing early fruit set due to bad weather after opening, you can resort to hand pollination, but try to utilize natural pollinators first.
Timing for Flowering
If you delay opening for pollination by more than a few days past peak flowering, you risk significant yield loss on many vegetables. Get ahead of this by checking which varieties need insect help.
Takeaways: open progressively, time for bloom weather, avoid delays to prevent yield loss, reduce removal shock, consider hand pollination if covers stay closed.
Vegetable Care Under the Tunnel Roof
Once the structure is up, tending to plants changes slightly. You’ll need different strategies for water, shade, and overall plant health compared to open-field gardening.
Watering Best Practices Inside a Tunnel
One of the biggest dangers beneath plastic is overwatering, as evaporation is severely limited. Always check the soil moisture level by feel—stick your index finger down 1 to 2 inches. If it’s still damp, wait another day.
The absolute best solution for this environment is installing a dedicated drip irrigation under tunnel system. This delivers water directly to the root zone, minimizing foliage wetness, which is exactly what fungal pathogens love.
Avoid Overwatering Signs
Droopy plants when the soil is wet is a dead giveaway that roots are suffocating due to lack of oxygen. This is critical service information for anyone managing a community plot.
- Check: wilting with wet soil, yellowing older leaves, or mushy stem bases — root oxygen’s starved; act now.
- Prevent: use the finger test or a moisture sensor; water only when root depth feels dry.
- Fix: improve drainage with compost, raise beds, and water at soil level early in the day to cut humidity and fungal risk.
When you do water, do it early in the morning so the sun and ventilation can dry any condensation off the leaves by midday.
Drip Irrigation Setup
Setting up drip lines is straightforward, especially under the cover. Use a low-pressure system, which works perfectly if you are running off a rain barrel or utilizing standard residential pressure.
Takeaways: keep pressure low (1–2 psi), shorten runs of drip tape, place emitters directly at the root zone of your plants, and monitor soil moisture consistently with a simple probe.
Crop Timing: When to Plant Under Tunnels
The whole point of this equipment is timing! For fall greens and overwintering crops, you should be focusing on planting anywhere from mid-August through late September, ensuring the plants establish before the coldest days arrive.
For spring planting, you can usually transplant sensitive seedlings about one to two weeks earlier than you would in an open field, provided you have good low tunnel ventilation tips ready for sudden warm-up spells.
- Plant mid-August–late September for fall greens (stagger every 2–3 weeks).
- Transplant Brassicas late summer for overwintering with layered covers.
- Start spring warm-season transplants in tunnels 1–2 weeks early.
Always employ crop rotation between seasons to keep the soil biology happy and productive.
Ideal Crops for Early and Late Season Tunnels
When extending the season, focus on crops that thrive in cooler temperatures but benefit from protection against harsh freezes or windburn. Think about crops that reach maturity in about 60–75 days.
| Early Season | Late Season | Notes |
|---|---|---|
| Lettuce, spinach, peas | Kale, collards, leeks | Protects from wind/pests |
| Broccoli, strawberries | Winter lettuces, onions | Start tomatoes ~2 weeks early |
| Beets, carrots, onions | Beets, radishes, claytonia | Use south-facing rows for warmth |
These cool-season champions appreciate the consistent mildness offered by a 3–5°F temperature boost paired with wind protection.
Overwintering Cool-Season Crops Under Tunnels
If you properly reinforce and layer covers, you can achieve true overwintering for hardy greens like kale, spinach, and certain Asian greens. The key here is adding a second layer—perhaps heavy fabric over the plastic—on the coldest nights.
Be aware that in winter, the plastic blocks rain entirely. You must manually water, usually on warmer days when ventilation is already open. Consistent moisture prevents the plants from drying out completely in winter sun.
| Crop | Planting window | Tip |
|---|---|---|
| Kale | Mid-Aug–Sep | Matures early; hardy |
| Spinach | Aug–Sep | Sow denser for harvest |
| Beets | Aug–Sep | Lift if ground freezes |
Remember to consult any local requirements regarding structure size or soil disturbances if you plan to leave the system in place year-round.
Repairing Tears and Replacing Covers
Even the best UV-stabilized plastic eventually degrades. Inspect your cover thoroughly at the start of each season, preferably on a day when the sun shines *through* the material, highlighting pinholes.
- Choose patch: Use UV-resistant tape specifically designed for greenhouse plastic. Cut the patch so it extends at least 2 inches beyond all damaged edges.
- Apply: Ensure the area is clean and dry, smooth out any air bubbles immediately, and double-layer large rips.
- Replace when: If you find widespread thinning or a major tear on the windward side, replacement is usually safer than repair.
When replacing, always remove the old cover and store it flat in a dark, shaded area to maximize the lifespan of the new material when it’s time to use it again next year.
Moving or Reconfiguring Tunnels Efficiently
If you follow an annual crop rotation plan, you’ll need to move your low tunnels. The trick to moving them efficiently is disassembly management.
Lift covers and unclamp boards first—use bungees for speed so plants get ventilation and stay intact.
After removing the cover, you can often leave the rebar stakes in the ground, but you should disconnect the hoops. It helps if all your hoops in a section are temporarily connected together—maybe with rope or zip ties—so you carry the assembly rather than individual pieces.
For the new location, repeat the soil testing you did initially. Don’t just move the tunnel to an empty spot; move it to a freshly amended spot to give your next crop the best possible start.
Cost Breakdown and Budget Options
Let’s get real about the investment. You don’t need the most expensive components to achieve great results, especially on a small scale. The cost-effectiveness comes from longevity and material reuse.
- Low-cost: ~$35–50 per 100 ft — This uses basic wire hoops, thin punched plastic, and simple rebar stakes. Expect to replace the cover annually.
- Mid-range: ~$100–130 per 100 ft — This often includes EMT or slightly thicker PVC, slitted plastic, and reliable spring clips. This setup is much easier to manage daily.
- High-end: ~$150–200 per 100 ft — Expect galvanized hoops, professional wiggle wire channels, or heavy-duty plastic that lasts many years.
When sourcing materials, buying components like the conduit or PVC in bulk racks is always cheaper than buying pre-cut kits.
Safety Tips and Local Regulations
While low tunnels seem benign, safety is always paramount. Before you even hammer in the first stake, call utility services to ensure you aren’t unknowingly setting up over buried gas or electric lines.
| Topic | Tip |
|---|---|
| Utilities | Call before you dig |
| Anchoring | Heavy objects or stakes |
| Materials | 4‑mil UV polyethylene |
| Ventilation | Lift covers daily when warm |
| Permits | Verify local codes |
Also, check local zoning. In some areas, even small hoop structures need a permit if they approach proximity rules for permanent structures.
Common Mistakes and How to Avoid Them
Most low tunnel failures boil down to rushing the setup or ignoring the thermal consequences of covering plants. Don’t treat tunnel management as an afterthought; it requires daily attention!
Ever wonder why some low tunnels thrive? Prep soil, plan spacing, and manage heat — stay intentional for better harvests.
- Rushing Soil Prep: Fix the ground first. Weeds, rocks, and compacted soil guarantee uneven support and poor root health. Level everything before you install hoops.
- Poor Spacing: If your hoops are too far apart, the cover sags in the middle, collecting water and snow, leading to collapse. Stick to the tighter spacing in uncertain weather.
- Ignoring Heat: This is the big one. If you leave plastic securely closed when the sun is out, you will cook your crop. Venting must be a daily habit.
By focusing on intentional setup and daily checks, you ensure that the structure serves your community reliably throughout the season.
Quick Maintenance Checklist for Season-Long Use
Consistency is the secret sauce for anything in the garden that needs to last. You should be inspecting your low tunnel at least once a week, and certainly after any significant weather event like high winds or heavy rain.
| Task | Frequency | Why it matters |
|---|---|---|
| Inspect frame | Weekly | Prevent collapse |
| Check covers | After storms | Replace tears fast |
| Monitor soil/moisture | Daily–weekly | Avoid rot or drought |
The most important maintenance task during the active growing season is ensuring all ventilation clips are working properly and that the edges are always weighted down.
Frequently Asked Questions
Can I Use Low Tunnels for Potted Plants or Containers?
Yes — you can use low tunnels for containerized crops. You’ll simply adapt the hoop spacing to cover a cluster of pots, using the tunnel for cold protection and pest exclusion. This flexibility helps boost yields across portable setups.
How Do I Prevent Snow Load Collapse in Winter?
To prevent snow collapse, reinforce your hoops heavily, preferably using EMT or adding a center stringer across the top. Keep the spacing tight (2–3 feet between hoops) and religiously clear snow off the top structure as soon as it accumulates.
Can I Run Drip Irrigation or Soaker Hoses Inside Tunnels?
Absolutely. Drip irrigation systems are fantastic under low tunnels because they deliver water precisely to the root zone without wetting the foliage, which drastically cuts down on fungal disease risk.
Are There Fire Risks With Plastic Covers Near Heat Sources?
Yes, plastic covers present a fire hazard near external heat sources like propane heaters. You must maintain safe clearance distances, use fire-retardant materials if possible, and never connect plastic directly to any heating unit.
Do Low Tunnels Affect Beneficial Insect Habitats Long-Term?
Long-term, they change the habitat. Since low tunnels exclude pest-eating insects along with pests, you need a management plan that includes the seasonal removal or opening of covers to allow beneficial insects access when they are needed for pollination or pest control in later stages.
Conclusion
Mastering the low tunnel is one of the most satisfying steps you can take to reliably extend your growing season. Whether you are aiming for the very first spring lettuce or the last hardy kale of winter, this simple season extension method delivers results.
Remember the core goal for how to build a low tunnel: use sturdy, consistent supports every 3 to 5 feet, secure your cover tightly, and commit to daily venting management. I still remember salvaging a row of carrots from a surprise late-April killing frost thanks to a simple PVC hoop frame—it’s worth every minute of the setup!
Simple materials, steady care, and quick checks equal a longer season and significantly less worry for everyone counting on your harvest.


