
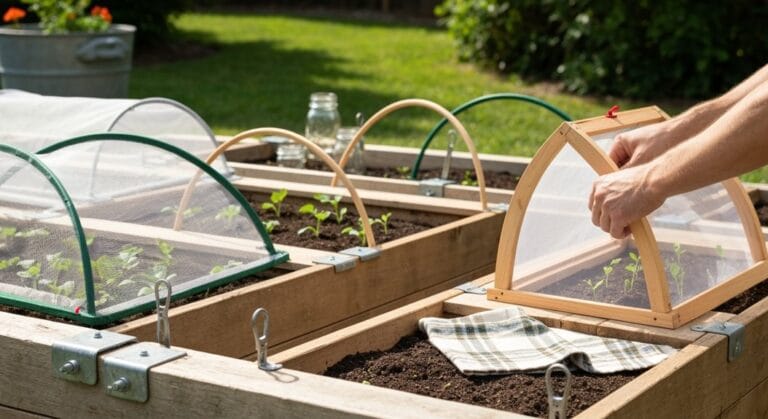

If you’re serious about maximizing your harvest and protecting your hard work, mastering raised bed covers is your next big step. Think of these covers as flexible, custom shields for your garden beds—they are the secret weapon for season extension and guarding those precious veggies against the elements and unwanted critters.
Whether you’re battling unpredictable late spring frosts, blinding summer sun, or sneaky garden pests, the right cover solution absolutely changes the game for serious home gardeners. We’re going to walk through exactly how to choose the best material for raised bed covers, master a simple raised bed cover installation using those handy mini hoops, and establish a maintenance routine so your system works hard for you, not the other way around.
Your Raised Bed Cover Action Plan: Season Extension & Protection
- Match Material to Mission: Float a light row cover for pests/frost, deploy shade cloth for heat defense, or use clear plastic strictly for early-season soil warming.
- Measure Twice, Cut Once (Plus Overhang): Measure your bed at several points, then plan for a minimum of 4–6 inches of overhang on all sides. This ensures you can secure a taut, effective seal.
- Frame It Up Simply: Use rot-resistant wood for sturdy base frames. For light structures, assemble flexible PVC pipe segments for easy-to-use, effective mini hoops.
- Secure and Anchor: Place your structural hoops roughly every 4 feet. Anchor the frame deeply using rebar stakes or by driving posts into the ground, and use specialized clips or heavy weights to keep cover edges tight.
- Maintain Vigilance: Inspect monthly for wear and tear, clean off any accumulated debris, and—this is crucial for sunny days—ensure proper ventilation to prevent deadly overheating inside the structure.
Why Use a Raised Garden Bed Cover? The Real Gardening Perks
The upfront benefit is clear: defense. You are protecting your beautiful baby crops from birds, rabbits, deer, and every insect looking for a free meal. This drastically cuts down on your need for daily chemical intervention, saving your budget and helping the environment.
But covers do so much more than just keep invaders out! Since raised beds naturally shed cold air and warm up faster in the spring, adding a cover system accelerates soil warming even more. This is your golden ticket to planting days—sometimes weeks—earlier than traditional ground plots.
A floating fabric, often called a row cover, lets necessary light and air in while keeping threats out. It creates a wonderfully gentle microclimate inside your bed. In simple terms, it’s a small, controlled world where your tender seedlings can strengthen up before facing the full might of nature alone.
When weather forecasts turn sour, structures built with mini hoops allow for incredibly fast deployment. This responsiveness is invaluable when a surprise spring frost shows up right when your first tender greens are emerging. Being ready makes all the difference!
Choosing the Best Material for Raised Bed Covers
Now we need to pair the protective material with the specific challenge you face this season. There isn’t one perfect answer; your choice depends heavily on your primary threat.
If you are primarily fighting cold snaps, choose lightweight row cover materials. These drape easily over a basic hoop structure and just need a few heavy rocks or clamps to stay anchored in a stiff breeze.
For maximum early-season heat absorption or weed suppression, look toward plastic mulch. Black plastic excels at pulling heat from the sun, while clear plastic is best utilized very early to really boost that initial soil warming below the surface.
When the problem shifts to intense summer conditions, you need the best material for raised bed covers to keep pests out while offering solar relief. Shade cloth steps in here, typically cutting down harsh summer light by 50% to 70%, saving sensitive crops like lettuce or herbs from scorching.
- Row Covers: Excellent for providing the best raised bed cover for frost protection and acting as a light insect barrier.
- Plastic Mulch: Primarily used to boost soil temperature and lock in deep soil moisture.
- Cold Frames & Hoops: Perfect for creating protected environments for the most tender early-spring seedlings.
- Shade Cloth: Mandatory defense when facing high midday sun exposure in summer heat waves.
- Netting/Hardware Cloth: Use a sturdy weave, like hardware cloth pest exclusion, for physical defense against larger creatures like curious birds and rabbits.
Essential Materials and Tools for Durability and ROI
When you are assembling your cover system, always focus on long-term durability. Nobody enjoys rebuilding their entire greenhouse structure every single spring! If building a permanent frame, use rot-resistant lumber. If you prefer lightweight tunnels, grab flexible 3/4″ PVC pipe for those inexpensive mini hoops.
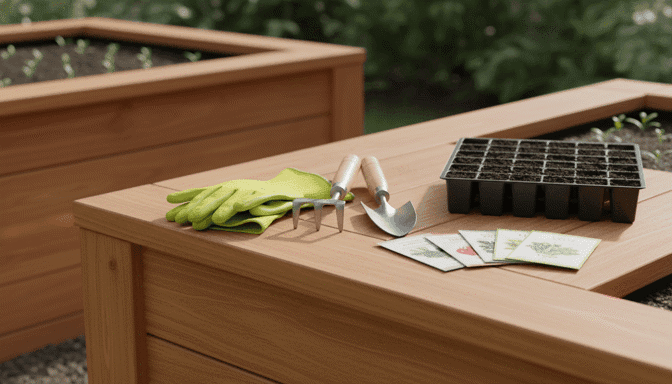
For high-value beds where burrowing is a regular issue, consider permanently securing hardware cloth pest exclusion around the bottom perimeter of your frame. This blocks rodents from tunneling up into your enriched soil while still letting necessary earthworms and beneficial fungi move through.
Crucially, look for fabrics labeled as UV-stabilized fabric. Standard, untreated plastic degrades incredibly fast under summer sun exposure. Invest in quality deck screws, sturdy metal clamps (spring clips work fantastic for fabric), and washers, which distribute the strain better than screws used alone when holding down a cover.
Cost Analysis: Maximizing Yield Increase from Using Raised Bed Covers
It’s smart gardening to analyze your investment versus the expected return. Truly low-cost solutions often involve clever repurposing. Using sturdy screening you already have, or cut-up clear plastic sheeting from large packaging deliveries, can create temporary pest barriers for next to nothing!
If you are building a semi-permanent system, PVC pipe is usually much more budget-friendly than bending heavy metal conduit for your hoops. When looking at fabrics, always compare the price of high-quality UV-stabilized fabric against cheaper alternatives that might only survive one season. That slight initial investment usually results in a real yield increase from using raised bed covers by preventing catastrophic losses in early spring.
The Takeaway Here: Calculate the cost per season. A premium raised bed cover for frost protection that lasts five years is ultimately far cheaper than a flimsy tarp system you have to replace every single year. That’s how you prove its return on investment surprisingly fast.
| Budget Level | Material Examples | Estimated Lifespan |
|---|---|---|
| Lowest Cost | Repurposed screening, salvaged plastic sheeting | 1 Season |
| Mid-Range | Floating row cover, 3/4″ DIY PVC hoops | 2–3 Seasons |
| High Durability | UV-treated shade cloth, dedicated aluminum frame kits | 5+ Seasons |
Precision Measuring: The Key to a Perfect Fit
Getting your measurements just right is the single most important step to avoid frustratingly flapping covers later. Nobody wants their hard-earned cover whipping around like a sail when a good wind picks up!
Measure your bed carefully—start with the tape and be methodical for a perfect-fitting cover.
Don’t just measure the top length one time across the center. Check the width at both ends and the middle point to account for any slight bowing in your wooden bed boards.
If you are creating a hoop tunnel, be sure to measure the height you need. You must ensure adequate clearance over your tallest intended crop! My suggestion? Create a trial template using cardboard or scrap fabric first.
Test fit that template, account for any known stretch the final material will have, and then cut your intended cover material. Always err on the side of cutting too large; you can trim excess material down later, but you can’t magically add fabric back on when you need just one more inch!
How to Install Raised Bed Covers with Mini Hoops for Rock-Solid Security
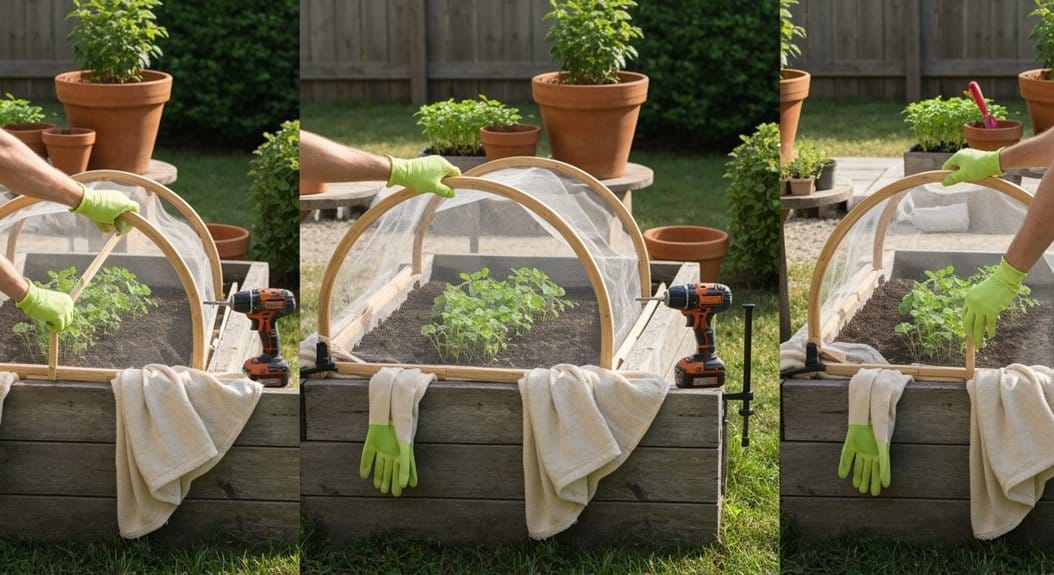
The installation process feels a lot like setting up a very cozy, low-profile greenhouse. If you are opting for a hoop system, stability starts with solid support points.
Install your structural supports—these could be PVC cement fittings that anchor the pipe corners, or simple metal ground sleeves—spaced about every 3 to 4 feet running down the length of the bed. Then, slip your PVC pipe segments (your mini hoops) securely over these receivers.
For extra strength against strong winds and tension, I highly recommend adding a central “backbone” support board running across the highest point of all the hoops. This simple addition prevents the structure from swaying side-to-side.
Drape your chosen cover material over the frame next. You want it taut, but never stretched so tightly that it tears where it attaches. Start by fastening the fabric at the two corners, then work your way toward the centers of the long sides to distribute the tension evenly.
Use robust clips, secure snap fasteners, or screws fitted with washers to attach the edges firmly to your frame or backbone board. If you are using temporary coverings, heavy rocks or even sandbags placed strategically along the edges work perfectly for fast deployment when you need immediate frost protection.
Durability and Long-Term Cover Care
The level of commitment you choose dictates the ongoing raised bed cover maintenance required. Temporary, thin covers, like standard row cover, are excellent for quick, short-term use but will likely need replacement annually due to UV damage and handling wear.
Conversely, semi-permanent structures, especially those using thicker polycarbonate panels or aluminum-framed lids, handle yearly cleaning much better and are far less prone to tearing when you urgently need to vent on a warm afternoon.
For the absolute best results, if you use plastic or fabric secured over wood, detach the entire cover in late fall. Clean it gently, and store it folded loosely inside a dark, dry shed or garage. Leaving material exposed to winter sun and snow accelerates material fatigue much faster than the growing season does.
Essential Maintenance, Ventilation, and Troubleshooting
Here is where many otherwise excellent setups fall apart! Your raised bed cover system is dynamic; it needs constant adjustment based on the weather you experience day-to-day. Schedule a quick visual inspection every two to three weeks to catch small issues before they turn into major crop disasters.
I learned this lesson firsthand when I noticed a tiny pinhole tear near a PVC elbow joint. Within one week, a very resourceful squirrel decided my tender broccoli patch was the perfect spot for a mid-day snack. Always check seams, clips, anchors, and look for signs of material breakdown from sun exposure.
The single most frequent maintenance task, especially on days where the sky is clear blue, is ventilation. Even cool-weather crops can overheat dramatically if the internal temperature spikes unexpectedly high. Use a simple indoor/outdoor thermometer and commit to cracking open vents or rolling up sides if the interior temperature gets just 5–10°F warmer than what feels comfortable outside.
Cleaning and Inspection Routine
We strongly advise washing down your covers at least once or twice a month during the peak growing period. Use nothing more abrasive than mild dish soap and clean water to gently remove grime that might be blocking essential light transmission.
- Rinse off all surface debris first, then wash the material gently using soft, non-abrasive rags or sponges.
- Thoroughly check every fixation point: clamps, staples, or frame connections must be secure against tension or wind.
- If you notice significant yellowing or brittleness developing in any plastic cover, make a note to order replacements before the next major selling season arrives.
- Always sanitize any reusable material completely before storing it away for winter dormancy to prevent mold.
Troubleshooting Overheating Protection
It is truly shocking how fast an enclosed space can heat up—sometimes reaching 20 degrees above the outside air temperature! If you see wilting plants even when the sun isn’t hitting them directly, you need better airflow immediately.
Make absolutely sure your vents or roll-up sides are large enough to effectively exchange the air inside the cover. If you see heavy condensation beading up on the underside of the fabric, that is a huge, flashing red signal that humidity is too high and air exchange is failing.
For very long beds, sometimes installing one small, low-power clip fan can help move air slowly along the row centers. Just be certain you aim the airflow across the tops of the plants, not directly blasting delicate leaves with a constant, harsh stream of forced air!
Frequently Asked Questions about Raised Bed Covers
Do raised bed covers require building permits or HOA approval?
It depends heavily on your local rules, so it’s always best to check. Small, temporary fabric covers almost never require permits, as they are treated like gardening tools. However, if you build a large, rigid, permanently framed structure that includes roofing elements, you might fall under local zoning or HOA height restrictions. Always check your local ordinances before building anything substantial.
Will raised bed covers affect my home insurance or liability?
Typically, standard gardening structures used for growing food do not impact your policy, but it’s always wise to check policy coverage limits, especially if you invest in very expensive, rigid structures. Be sure to secure covers properly to mitigate liability risks associated with unsecured objects blowing away in a storm.
Can I install covers over existing irrigation systems?
Absolutely! The trick is planning during the initial design phase for your structure. If you use drip irrigation, ensure your supporting stakes for the hoops don’t crush the existing tubing underneath. Using longer fasteners when attaching covers to the frame can often help keep everything clear below.
Are any cover materials fire resistant or a fire risk for my garden?
Yes, material choice matters for safety. Standard plastics, polypropylene, and dry bamboo materials can be significant fire risks, especially in dry, high-heat conditions. For high-risk areas, look for specialty fabrics explicitly rated as fire resistant or use metal frame systems with sturdy, non-combustible mesh options like hardware cloth pest exclusion.
Final Thoughts on Your Gardening Shield
You’ve now gathered the critical knowledge—from selecting the perfect raised bed covers to installing the hoops and planning your essential ventilation schedule. Now, take that next step and build your system!
Remember the cardinal rule: you absolutely must seal the gaps to keep pests out, but you must equally maintain adequate airflow so the plants don’t cook themselves on a sunny day. Aim for 2 to 4 inches of clearance space above your tallest existing plants when you secure the cover for a secure fit.
Invest in UV-stabilized fabric designed to handle your local sun intensity, and commit to that monthly maintenance check-in. By implementing these proven strategies, you will be harvesting fresh produce long after the first frost has shut down every other garden in the neighborhood. Happy covering!


