


So, you’ve decided to jump into the wonderful world of raised garden beds. That’s fantastic! They make gardening so much tidier, and getting the setup right from the start saves you a world of heartache later.
Setting up these boxes involves more than just stacking wood; it’s about creating the perfect micro-environment for your plants. We need to nail down the ideal raised garden bed dimensions, ensuring everything is accessible for you while being perfectly sized for those thirsty tomato roots.
Don’t worry, this isn’t rocket science. Think of me as your gardening buddy who already made the initial mistakes. We’ll cover the best width and length for your space, how to determine the perfect raised bed depth requirements, and even touch on pathways and what materials often work best.
The Golden Rules for Planning Ideal Raised Bed Size
If you take away anything from this section, let it be the dimensions. Getting the width and height right balances easy plant access with ensuring you have enough soil volume for healthy root systems.
The sweet spot for a comfortable build balances reachability with soil volume. For most home gardeners planning for two-sided access, aiming for a raised garden bed width between 3 and 4 feet (36 to 48 inches) is perfect. This width allows you to easily tend the center without having to lean so far over that your back immediately protests!
What if you only have access from one side, say against a fence or a shed wall? In that case, shrink that width down to about 2.5 feet (30 inches). Remember, avoiding that constant, awkward reach is the key to enjoying your gardening sessions.
Now, for the length, the rule is more flexible. Generally, 6 to 10 feet works well, often dictated by the lumber you buy. A popular and highly manageable size is the 4×8 foot bed because it uses standard building material dimensions efficiently. If you have a huge space, just use multiples of these balanced sizes for a modular, organized look.
Determine Optimal Raised Bed Depth Requirements for Happy Roots
This is where you decide how happy your carrots and tomatoes are going to be! A shallow box leads to stressed roots, especially when the summer heat hits hard. We are talking about adequate soil depth, which dictates drainage, aeration, and how much nutrition your plants can access.
- Minimum Depth (Shallow Roots): If you are only growing small herbs or shallow-rooted greens like spinach and lettuce, 8 to 10 inches of soil depth is often enough to get by.
- Standard Depth (Most Veggies): For a good mix of crops—like bush beans, broccoli, and peppers—target 12 to 15 inches. This comfortably gives most roots room to breathe and store moisture.
- Deep Feeders & Accessibility: For crops that truly love depth, like tomatoes, root vegetables (carrots, potatoes), or if you need extra height for standing access, aim for 18 to 24 inches. Deeper beds also offer fantastic drainage improvements, which is a huge plus if your native soil is heavy clay!
If you are setting up a bed specifically for wheelchair access, you’ll want the sides higher—think 24 to 30 inches—so you can easily reach the soil surface without strain from a seated position.
Path Spacing Requirements Between Raised Beds
We’ve sized the beds; now we must consider the ‘negative space’—the pathways between them. Poor path spacing can make your garden feel cramped, frustrating your gardening efforts and preventing you from maneuvering necessary tools.
For comfortable walking and general tending, plan on at least 18 to 24 inches between your raised beds. This is the minimum needed for a casual stroll and light weeding around the edges.
However, if you regularly use a wheelbarrow to haul finished compost, need to use a small tiller, or require accommodations for mobility aids, bump that space up. A 36-inch path width is ideal for allowing carts or wheelchairs easy passage.
Path width matters—pick widths that suit both comfortable strolling and necessary equipment access.
What about the path material itself? To help with drainage grading around your beds and keep things tidy, use permeable, firm surfacing like gravel, pavers, or decomposed granite. Aim for about 2–4 inches of depth for these materials to keep mud from turning into muck after a heavy rain.
Material Lifespan and Cost Considerations (Content Gap Addressed)
While we focus on size, it’s worth a quick thought on what your beds are made of, as this impacts long-term cost and durability. A beautiful cedar bed might look great now, but understanding its lifespan helps budget for future replacements.
Cedar and redwood are garden favorites because they are naturally rot-resistant, often lasting 10 to 15 years. Metal beds, while a higher upfront cost, can easily last 25 years or more with minimal degradation. If you choose standard, untreated pine, expect to only get 3 to 5 years before significant water damage requires replacement.
For the budget-conscious, using concrete blocks or untreated dimensional lumber for a base and then lining the interior with heavy plastic sheeting can sometimes extend life affordably, though be sure any plastic used is food-safe (like HDPE).
The Perfect Soil Mix for Optimal Drainage
You can have the best dimensions, but if your soil compacts into concrete, your plants will struggle. Raised beds wonderfully solve this when you control the mixture entirely!
A fantastic, time-tested base recipe is a simple 1:1 ratio of high-quality compost mixed with a soilless growing medium. That soilless media usually comes from a combination of peat moss or coconut coir, plus something for aeration, like perlite or vermiculite.
If your bed depth is over 16 inches, you can safely mix in up to 20% screened topsoil for added structure and native nutrients. The goal here is to create a structure that is light, fluffy, and capable of holding moisture without becoming waterlogged when you water heavily.
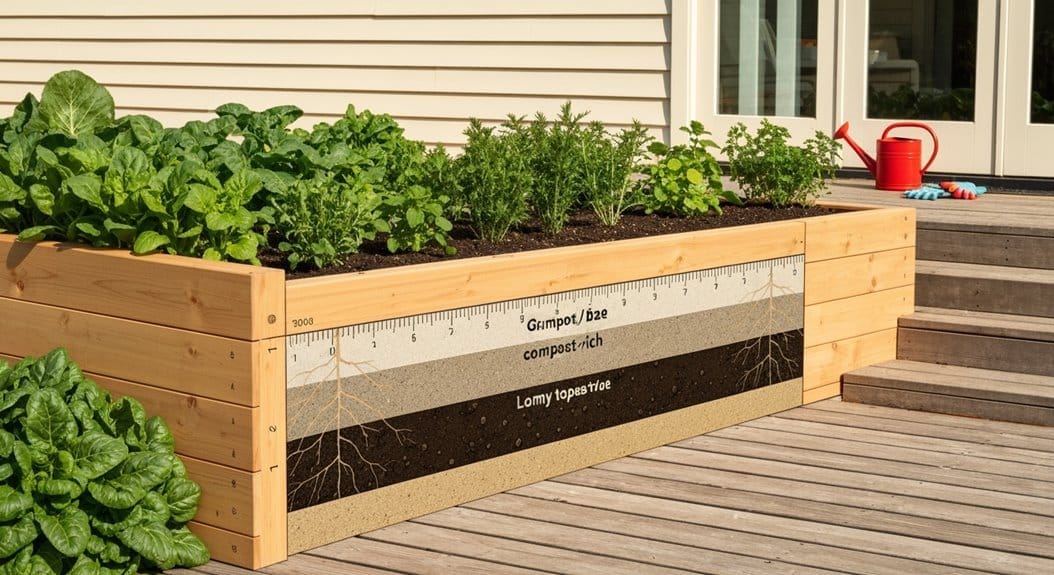
One small trick I always preach about: don’t fill the mix right to the top rim! Leave 1 to 2 inches of space below the wood. This buffer zone prevents the soil mix from washing out over the sides when you water heavily or when heavy rains hit.
Implementing Square Foot Gardening Spacing for Maximum Yield
Once the soil is perfect, overcrowding becomes the next enemy. The easiest way to manage planting density in your tidy boxes is by using the square foot gardening method. This means dividing your bed conceptually, either physically or mentally, into 12×12 inch squares.
You use your desired raised garden bed width and length to determine exactly how many of these squares you have available. Then, you plant according to the type of vegetable, spacing them perfectly within those zones.
- One per Square: Extra-large plants like cabbage or sprawling summer squash (if you let them sprawl a bit) get their own dedicated square.
- Four per Square: Larger items like bush beans, pepper plants, or standard heads of lettuce fit nicely four per square.
- Nine per Square: Medium-sized plants like beets or onions are happy spaced nine per square.
- Sixteen per Square: Small plants like carrots, beets, or spinach can be successfully planted sixteen to a square.
This system is brilliant because it forces you to think vertically and horizontally. It also lays a wonderful foundation for advanced techniques like optimizing your companion planting efforts.
Optimizing Crop Layouts for Sunlight and Yield
We need to think like architects for our crops. How do we arrange things so that the leafy greens we want don’t get permanently shaded out by the tall tomato plants?
The universal rule is to orient your bed north-to-south if possible. Then, always place the tallest plants on the northern side. This ensures that even when the sun is highest, the taller plants won’t cast a long shadow over shorter neighbors throughout the prime growing hours.
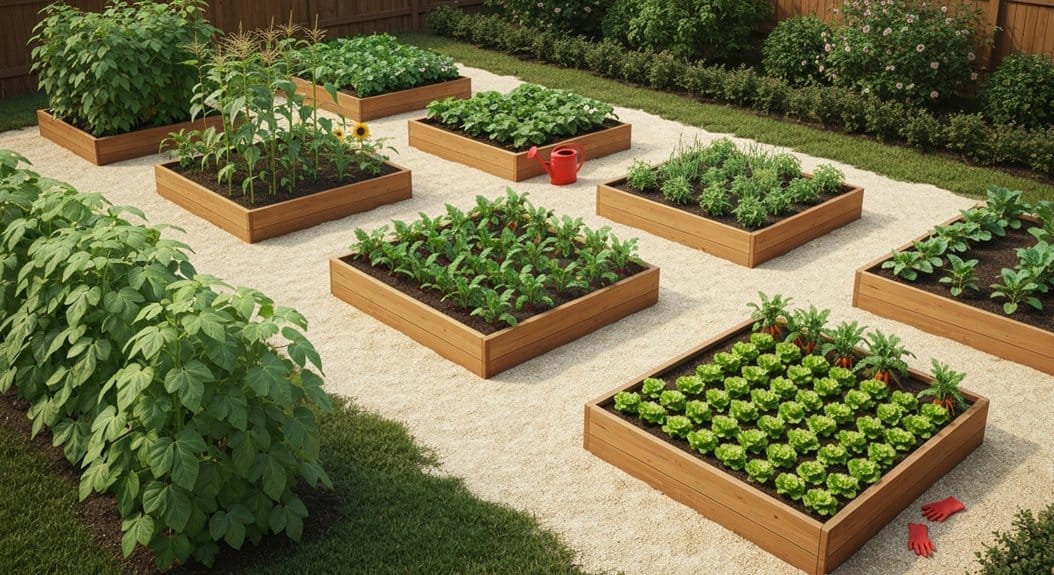
Actively use companion planting strategies to your advantage. Pair deep-rooted plants (like carrots) with shallow-rooted ones (like onions) to utilize different soil layers. Also, incorporate nitrogen fixers, like peas or bush beans, near heavy feeders such as corn or zucchini to naturally amend the soil as you go.
Don’t forget succession planting! When those early spring radishes are done producing, immediately replace that square footage with summer crops like basil or green beans to keep that growing space working hard all season long.
Addressing Climate Concerns: Watering Systems and Temperature Management (Content Gap Addressed)
Since raised beds heat up faster in summer and chill faster in winter compared to in-ground gardening, specialized attention to water and temperature is crucial, especially depending on your gardening zone.
Watering setup is certainly critical in raised beds because they dry out much faster than the ground. Installing a simple drip irrigation system or specialized soaker hoses underneath the surface is highly recommended. These systems deliver water directly and efficiently to the root zone, preventing water waste and keeping foliage dry, which happily cuts down on fungal diseases.
For regions with intense cold, consider insulating the beds in winter. You can build double-walled beds or temporarily wrap the exterior sides with heavy insulating blankets once the growing season ends to help protect dormant roots from severe freezes.
Frequently Asked Questions on Raised Bed Management
How wide should a raised garden bed be for two-sided access?
For easy access from both sides without excessive leaning, the ideal raised garden bed width is between 3 and 4 feet (36 to 48 inches). If you can only reach from one side (like against a wall), it’s better to keep it tighter, around 2.5 feet.
What is the ideal soil depth for tomatoes in raised beds and other deep-rooted crops?
Tomatoes, carrots, and other deep feeders need a solid foundation. While 12–15 inches is a good standard depth, aim for 18 to 24 inches of quality soil mix to ensure unrestricted root growth and better moisture retention during those hot summer weeks.
What material options are best for building long-lasting raised bed frames regarding lifespan?
The best materials balance longevity with cost. Cedar and redwood naturally resist rot, typically lasting 10 to 15 years. Metal (like corrugated steel) offers excellent durability and can last over two decades. Avoid standard pine unless you plan to replace the wood every few years.
What is the best height for raised garden beds for wheelchair access?
To ensure you can comfortably reach the center of the bed while seated, the frame height should be between 24 and 30 inches tall. This ergonomic height allows full visibility and access to all planting areas within the bed.
How do I set up square foot gardening spacing efficiently?
The method works by treating your bed as a grid of 12×12 inch squares. Simply determine how many squares fit the length and width of your bed, and then plant according to the density rules—for instance, 16 carrots fit in one square, while only one large cabbage plant does.
Do I need special irrigation for raised beds?
Yes, it’s highly recommended! Because the soil volume is contained and drains faster, installing a drip irrigation or soaker hose system ensures consistent moisture delivery right to the root zone, which is far more efficient than overhead watering.
Conclusion: Finalizing Your Perfect Raised Garden Bed Dimensions
Stepping back and planning your layout—from the essential raised garden bed dimensions to selecting the spot for your drip irrigation—is the biggest investment you can make in your future harvest. Remember the sweet spot for width: aim for 4 feet for easy reachability, stick to 12 to 18 inches deep for robust roots, and make sure your pathways are wide enough for your tools and comfortable access.
Trust these guidelines, prioritize easy reach, and ensure your soil is rich and fluffy (using that 1:1 compost mix!). Now go build something beautiful, and get ready for a season of rewarding gardening!


