


The Ultimate Guide to Growing Tomatoes in Raised Beds: Juicy Harvests Guaranteed
Welcome to the wonderful world of raised bed gardening for tomatoes! If you’re looking to skip the hassles of compacted native soil and leap straight into vibrant, healthy growth, you’ve come to the right place. We’re going to walk through exactly how to succeed when growing tomatoes in raised beds, covering everything from the perfect soil depth to that all-important watering schedule.
My goal here is simple: to give you the clearest, most actionable steps so you can enjoy a mountain of homegrown tomatoes this year. Forget complicated science; we’re keeping this warm, friendly, and practical for all home gardeners.
- Choose a south-facing, level site with 8+ hours sun for maximum happiness.
- Aim for a minimum 18-inch depth for those sprawling indeterminate tomatoes.
- Fill your bed with loamy, slightly acidic soil and amend heavily with compost.
- Bury seedlings deep—at least two-thirds of the stem—for robust roots.
- Install support structures right at the time of planting.
Ready to dig in? Let’s transform that empty frame into a tomato paradise.
Choosing the Best Location and Sun Exposure
Where you place your tomato haven makes a huge difference. Tomatoes are little sun worshippers, so they demand prime real estate in your yard. You absolutely must aim for full sun, which means at least eight hours of direct, uninterrupted light every single day.
If possible, choose a spot that allows you to orient the bed lengthwise running north to south. This ensures both sides get good sun exposure throughout the day. Also, make sure the ground is level—we don’t want soil or water pooling unevenly.
Think about airflow, too! Good air circulation helps dry foliage quickly after rain or watering, which is your first line of defense against fungal diseases that love damp conditions. Finally, keep your future tomato plants far away from large, established trees. Those nearby roots will compete aggressively for moisture and nutrients.
Preparing Your Raised Bed Construction and Material Choices
Let’s talk structure. Your raised garden bed construction choice can impact your tomatoes, especially temperature regulation. While wood is traditional, consider materials like metal or stone which can heat up faster in the spring.
If you choose wood, make sure it’s rot-resistant, like cedar. You want the bed deep enough to support the root systems tomato plants crave. This leads directly into our guide: raised bed tomato depth is critical.
For smaller, bushier determinate tomatoes (those that stop growing once fruit sets), a minimum of 12 inches of depth is acceptable. However, for sprawling indeterminate varieties—the ones that keep producing all season—you need at least 18 inches. Deeper soil simply allows for a more extensive, healthier root network.
A standard 4-foot wide bed is perfect because you can easily reach the center from either side. Be sure to brace those corners well; soil is heavy when wet, and you don’t want bowing!
Building the Best Soil Mix for Tomatoes in Raised Beds
This is perhaps the most vital step in growing tomatoes in raised beds. We aren’t just using dirt; we are engineering the perfect environment. Tomatoes thrive in well-draining, loamy soil that offers good aeration.
The ideal target for your tomato pH level is slightly acidic, leaning between 6.0 and 6.8. This range ensures your plants can access the nutrients already present in the soil mix.
Soil Composition Basics
We need a mix that balances moisture retention with excellent drainage. That’s where loam excels—it has a good mix of sand, silt, and clay particles. If your mix feels like it packs into a sticky ball when squeezed, you have too much clay! If it feels gritty and falls apart instantly, you might be too sandy.
To adjust pH, use lime (to raise it a bit) or sulfur (to bring it down). But the real secret weapon is organic matter. Don’t skimp here.
Adding Organic Matter for Richness
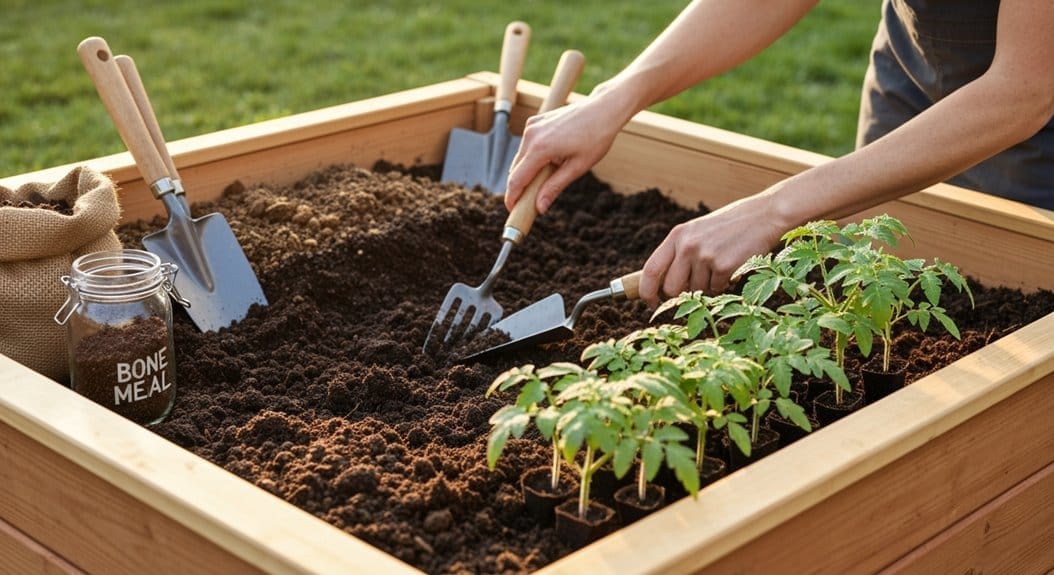
Incorporate three to four inches of well-aged compost or manure into the top 12 to 18 inches of whatever medium you use. Compost is nature’s time-release fertilizer, improving soil structure while slowly feeding your hungry tomatoes.
I remember one season I rushed the compost application, and my seedlings looked hungry within weeks. Lesson learned: truly work that compost in! Keep topping up with a fresh layer of compost throughout the season to maintain that rich environment.
Timing: When to Start Seeds and Plant Out
Getting the timing right is crucial, especially when dealing with unpredictable spring weather. To get a jump start, begin your seeds indoors about six to eight weeks before your area’s average last frost date. Use warming mats if you can, as tomato seeds germinate best when the soil temperature is around 80°F.
When are they ready for the great outdoors? You must wait until nighttime temperatures consistently remain above 45°F. Raised beds warm up faster than the ground, which is a bonus, but don’t rush the transplants!
Selecting Varieties and Addressing Disease Resistance
This is where we fill one of our content gaps: choosing the right type greatly impacts success in a confined space like a raised bed. Determinate varieties are compact and good for smaller setups, producing most of their fruit at once. Indeterminate varieties vine vigorously and require taller, stronger support—perfect for deeper beds.
When shopping for seedlings, look closely at the tags. You want varieties boasting multi-disease resistance! Look for resistance codes like ‘F’ (Fusarium Wilt) or ‘V’ (Verticillium Wilt). Choosing naturally resistant hybrids often saves you weeks of worrying about blight later in the season.
Transplanting: Planting Depth and Techniques for Strong Starts
When you transplant your seedlings, you have a secret weapon against future instability: planting them deep. Tomatoes are unique because they can grow roots right along the buried portion of the stem.
The universal rule for how deep to plant tomatoes in raised beds is to bury about two-thirds of the entire stem. If your seedling is leggy (long and thin), don’t panic! Lay it down in a shallow trench, gently curving it, which encourages roots all along the buried stem portion.
Planting Depth Guidelines
Before you plant, give your seedlings a good, deep drink of water a few hours prior. This makes the root ball cohesive. Plant deeply, remove any leaves that will end up beneath the soil line to prevent rot, and then gently firm the soil around that buried stem.
If you plant on a sunny afternoon, try to transplant later in the day or on a cloudy day to reduce transplant shock. Water immediately after planting to settle everything in.
Trench Vs Vertical Planting
Deciding between laying the plant down (trenching) or planting straight up (vertical) depends on your soil moisture. Trenching creates a wider, shallower root zone, which means you’ll need to monitor your watering schedule for tomatoes in raised garden beds a bit more closely.
| Method | Root zone | Watering |
|---|---|---|
| Trench | Shallow, wide | Frequent |
| Vertical | Deep, concentrated | Less often |
Spacing Plants and Installing Support
Proper spacing is key; it ensures every plant gets enough sun and air circulation. For most standard tomato types, plan on spacing them about 18 to 24 inches apart within the bed. If you have a smaller variety, you can usually get away with 12 to 18 inches.
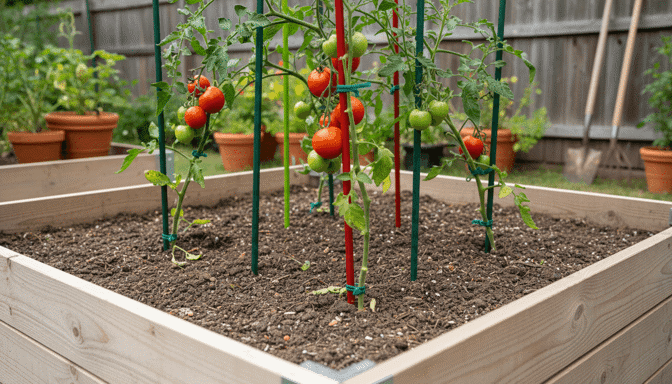
Crucially, install your tomato plant support—whether it’s sturdy cages or tall stakes—at the time of planting. If you wait until the plant is large, you risk severing crucial surface roots when hammering in stakes. I learned this the hard way; root damage never pays off!
Watering, Mulching, and Fertilization Schedule for Peak Performance
Since raised beds drain faster than in-ground gardens, the watering schedule for tomatoes in raised garden beds needs careful attention. In peak summer, established plants often need deep watering three to four times a week. You want the water to soak down deeply—aim for an inch or two of water penetration per session.
Watering in the morning is best so the leaves dry before evening.
Mulch Types and Depth
Mulch is non-negotiable! Apply two to three inches of organic mulch, like straw or shredded leaves, over the soil surface after the soil has warmed up post-planting. This blanket moderates root temperature, dramatically cuts down on water evaporation, and keeps weeds in check.
Just remember to leave an inch or two of breathing room right around the base of the tomato stem to prevent any moisture buildup that could lead to collar rot.
- Apply 2–3 inches of straw or shredded leaves.
- Water deeply 3–4 times per week depending on heat.
- Keep mulch a few inches away from the main stem.
Fertilizer Schedule and Rates
Tomatoes are heavy feeders, especially when we push them hard in containers or raised soil. You should start feeding once the first true flowers appear. A good strategy is to use a fertilizer slightly higher in Phosphorus and Potassium (the P and K) once they start fruiting, rather than focusing only on Nitrogen (N).
Instead of one massive feed, use the side-dress approach mentioned in the original notes, supplementing every 4–6 weeks with compost or a balanced, low-dose organic liquid feed. This steady **tomato care in raised beds** prevents nutrient shock.
Pest and Disease Prevention with Crop Rotation
Even in a gorgeous new raised bed, soil-borne issues can linger if you plant the same crop family repeatedly. This is where crop rotation for tomatoes comes in. Tomatoes belong to the Nightshade family (Solanaceae).
For the best long-term soil health, avoid planting tomatoes in that exact spot for at least two to three seasons. Plant legumes (beans, peas), or brassicas (broccoli, cabbage) there instead. This simple strategy naturally breaks pathogen cycles in the soil, leading to healthier harvests year after year.
| Year | Plant Family | Benefit |
|---|---|---|
| 1 | Solanaceae (tomato) | Harvest |
| 2 | Legumes (beans) | Nitrogen fix |
| 3 | Brassicas/Herbs | Break pathogens |
Pruning, Monitoring, and Harvesting Tips
To maximize yields in a defined space, you need to prune. Pruning directs the plant’s energy into making tomatoes, not endless leafy growth. Immediately remove any leaves that are touching the soil surface—they are entry points for soil-borne disease.
Next, focus on pinching out the “suckers.” These are the small shoots that form in the angle (the axil) between the main stem and a leaf branch. By pinching about two-thirds of these off, you encourage the main stems to strengthen and focus on fruit production.
Prune lower leaves and pinch suckers so one or two strong stems focus energy into fruit
Check your support structure weekly and gently tie up any new growth to the stake or cage before the stem has a chance to flop over. Harvest your tomatoes when they are fully colored and offer a slight spring when squeezed gently.
Frequently Asked Questions
- Q: What is the best soil mix for tomatoes in raised beds? A: Aim for a loamy texture, which balances drainage and moisture. A good starting point is a mix of 1/3 compost, 1/3 aged manure, and 1/3 peat moss or coco coir, finely tuned to hit a 6.0–6.8 pH.
- Q: Determinate vs. Indeterminate Tomatoes in Raised Beds—Which is better? A: Indeterminate varieties generally offer a longer harvest but need deeper soil (18+ inches) and very tall support. Determinate plants are better for shallower beds or smaller spaces since they stay more compact.
- Q: How deep should I plant my tomato seedlings in the raised bed? A: You should bury two-thirds of the stem! The goal is to encourage secondary root formation all along that buried section, giving the plant amazing stability and nutrient uptake.
- Q: What is a good watering schedule for tomatoes in raised garden beds? A: In warm weather, deep watering 3 to 4 times a week for 20–30 minutes is often necessary, as raised beds dry quickly. Always water the soil, not the leaves, preferably in the morning.
- Q: Do I need to rotate crops if I use new soil every year? A: While using fresh soil mitigates some issues, crop rotation is still highly recommended. It helps break disease cycles that build up in the root zone over time and improves overall soil biology.
- Q: How can I extend the harvest season with cold protection? A: You can extend harvest by using cold frames and row covers, adding thermal mass and lights, securing covers nightly; you’ll protect plants, generously share surplus, and serve neighbors with later fresh tomatoes.
- Q: Which companion plants improve pollination or deter pests naturally? A: Plant borage benefits pollinators and parasitic wasps, and use marigold deterrence for nematodes while adding nasturtiums, basil, thyme, garlic, and calendula; you’ll increase pollination, protect tomatoes, and serve your community’s harvest with healthier, abundant fruit.
- Q: How should I clean and store cages, stakes, and pruning tools? A: Clean with care, store with respect: follow cleaning routines—scrape, wash, disinfect; dry fully; oil metal and sharpen blades. Use storage methods—hang tools, keep cages off the ground, label and organize so you’ll better serve others.
Conclusion
You’ve taken the guesswork out of the equation. Growing tomatoes in raised beds isn’t guesswork; it’s a formula for success based on deep planting, perfect soil nutrition, and consistent hydration.
Remember the key rules: get that sun exposure right, bury those stems deep for powerful roots, and water deeply but regularly. Treat your raised bed right, and those steady efforts will reward you with the sweetest, juiciest tomatoes you’ve ever grown. Happy harvests!


