


If you’re serious about vegetable gardening but exhausted by constant watering, installing an automatic drip irrigation system for raised beds might just be the best decision you make all season. It’s like hiring a tiny, incredibly efficient robot to water your plants precisely where they need it—right at the roots.
We’re going to walk through setting up your own drip irrigation for raised beds. This isn’t just about convenience; it’s about cutting water waste, promoting healthier growth, and ditching that handheld watering can forever. Ready to automate your garden?
Why Drip Irrigation is a Game Changer for Raised Beds
For raised beds, drip irrigation is leagues ahead of traditional sprinklers. Sprinklers waste water through evaporation and spray leaf surfaces, which can encourage fungal diseases. Drip, however, is focused and gentle.
You’ll see real water savings with drip irrigation raised beds—often 30% to 50% more efficient than overhead watering. Because the water goes straight to the root zone, the soil stays evenly moist, stressing the plants less.
Another wonderful side benefit? Weed suppression. When you only water the soil directly under your crops, the bare soil between them stays dry. This means fewer weed seeds germinate, saving you precious weekend weeding time.
Plus, setting up an automatic drip system for raised beds means you gain hours back in your week. Once the timer is set (usually for a quick 10 to 30 minutes, morning or evening), you can go on vacation knowing your garden is perfectly hydrated.
Core Components for a Low Pressure Drip Irrigation Raised Beds Setup
Setting up a reliable raised bed drip system relies on a few essential parts working together. Think of this as a controlled pathway to deliver precise amounts of water.
The sequence starts at your outdoor spigot and moves toward the bed. You need more than just tubing; you need smart plumbing to manage the pressure.
Here’s the essential lineup:
- Automatic Timer: This is the brain, handling the scheduling.
- Backflow Preventer (Anti-Siphon Valve): Mandatory! This stops contaminated water from flowing backward into your household supply.
- Pressure Regulator: Critical for low pressure drip irrigation raised beds. Standard hose pressure is far too high and will blow out your emitters. This usually knocks the pressure down to 15-30 PSI.
- Filter: This catches sediment so tiny drip emitters don’t clog up mid-season.
- Mainline Tubing (usually 1/2 inch): The primary artery running along the length of your garden area.
- Drip Laterals (usually 1/4 inch): Smaller lines that branch off the mainline to run right next to your plants.
- Drip Emitters: These are the workhorses, delivering water at measured rates (0.5 to 2 Gallons Per Hour, or GPH). Thirsty plants like tomatoes usually need higher flow drip emitters.
DIY Drip Kits vs. Pre-Assembled Systems: Which to Choose?
This is definitely where a lot of gardeners get stuck. Should you buy a pre-packaged kit or source the parts yourself?
Pre-assembled drip irrigation for raised beds kits are fantastic for beginners. They come with just enough tubing, emitters, and connectors to cover a standard 4×8 foot bed. They are fast to assemble, which is great if you want to skip hunting down every specialized fitting.
However, sourcing components yourself offers superior flexibility and often slightly better pricing if you have many beds. If you know you need specific types of emitters—say, 1 GPH emitters for carrots and 2 GPH emitters for peppers—buying components allows you to customize the flow exactly.
Pro Tip: If you have more than two beds, buying a bulk pressure regulator, a longer mainline run, and a good multi-port timer separately usually saves money compared to buying three small starter kits.
Designing an Efficient Layout for Your Raised Beds
The layout is where you translate your planting map into effective watering zones. The goal is uniform coverage, meaning the plants at the far end get the same amount of water as the plants right near the valve.
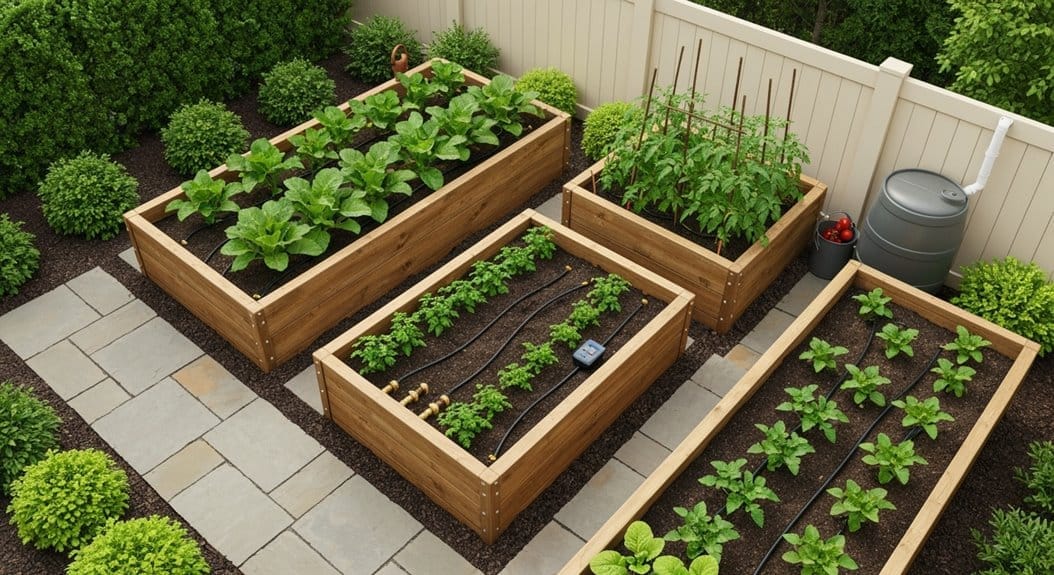
For standard, densely planted beds, especially those 4 feet wide, running parallel lines is the most effective strategy. We aim for even distribution, so running three parallel drip lines spaced roughly every 12 inches across a 4-foot bed works perfectly.
If you have deeply spaced plants, like individual pepper plants, you might use individual drip emitters punched directly into the mainline near each plant base. However, for dense leafy greens and row crops, running continuous 1/4″ micro-tubing with emitters spaced every 6 to 12 inches will give you fantastic coverage.
To protect the lines, you can slightly trench the tubing 2 to 6 inches into the soil, or use mulch heavily over the top. Make sure to secure all lines with small landscaping stakes every 3 feet so they don’t shift when you’re working around the beds.
Drip Irrigation Setup for Raised Beds Steps: A Quick Guide
Here is the sequence for how to install drip irrigation in raised beds efficiently, starting from the tap and ending at the far corner of your garden.
First, connect your components to the spigot in order: Hook up the Y-connector (if you want to keep one side open for hand watering), attach the automatic timer, then the backflow preventer, followed by the filter, and finally the pressure regulator.
Next, connect the 1/2″ mainline tubing. If the tubing is stiff, dip the end in a bucket of very hot water to soften it, making the connection points much easier to slide on. Run this mainline to the start of your beds and secure it with stakes.
Now it’s time for the laterals. Use T-fittings or elbow connectors to connect the smaller 1/4″ drip lines from the mainline into the bed area. Punch the required holes (using a specialized tool, usually included in kits) where you want water delivered and insert your chosen drip emitters or barbed connectors for the 1/4″ lines.
Once all lines are in place and emitters are set, cap the ends of all lines—these are often called ‘goof plugs’ or end caps. This ensures the system builds pressure correctly.
Before you finalize everything, perform a crucial step: flush the system. Run the water for a minute or two while the end caps are off to clear out any dirt or manufacturing debris that got into the lines during installation. Then, cap them, test the system at full pressure, and adjust any crooked stakes or leaking connections.
Drip Irrigation Maintenance for Raised Beds & Seasonal Care
An automated system isn’t truly set-it-and-forget-it; it requires periodic TLC to stay efficient. Think of maintenance as preventative medicine for your plumbing!
The most common failure points are clogs and leaks. You must check your filter regularly—ideally once a month during peak growing season—and give it a quick rinse. Clogged drip emitters will leave small, thirsty patches in your garden that you’ll notice quickly.
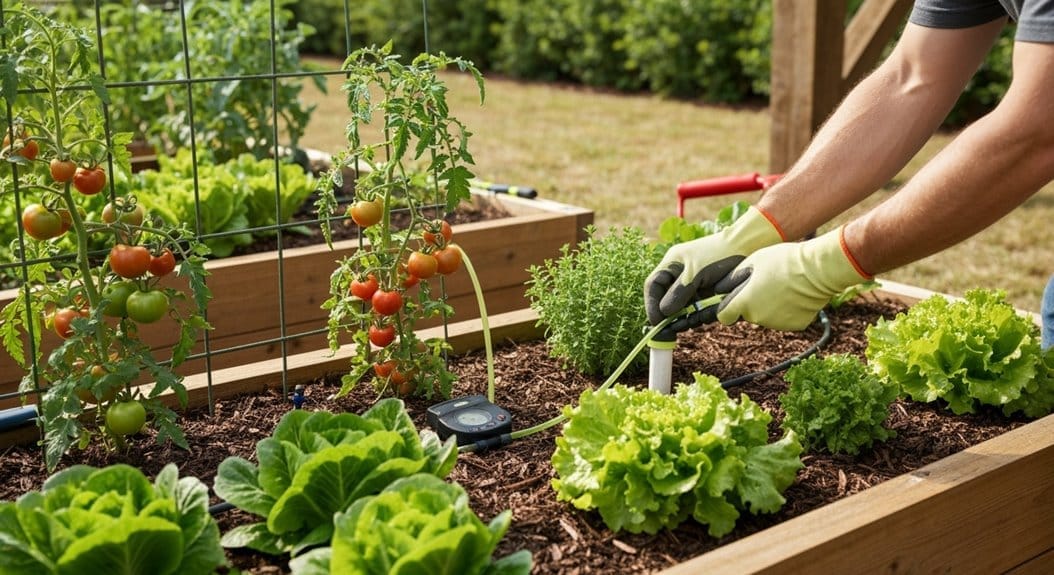
Seasonally, you should flush the lines (open the end caps and run the water for a few minutes) to clear any buildup. Always check the battery in your automatic timer before the season starts and before you switch it off for winter.
If you live where freezing temperatures occur, winterizing is non-negotiable. Drain all the water out of your system. Disconnect the timer and regulator, store them indoors, and leave the end caps off so any small remaining moisture pockets can evaporate rather than freezing and cracking the lines.
Frequently Asked Questions about Raised Bed Drip Systems
Are Permits or Local Regulations Required for Residential Drip Irrigation?
Usually, no permits are needed for simple residential drip setups connected to a standard outdoor spigot. However, if you plan on installing a completely subsurface system, tapping into a primary water line, or if your municipality has specific greywater or drought restrictions, you should check with your local building department just in case. It pays to know the rules!
Can I Legally Use Greywater or Rainwater in My Drip System?
You absolutely can use rainwater! Rain barrels connected to your system provide excellent, naturally soft water. Using greywater (water from sinks/showers) is more complicated; legality varies wildly by state and city. If you consider greywater, always use a dedicated filtration system and defer to local health codes, as public safety is paramount.
Will My System Integrate With Smart-Home Assistants and Wi-Fi Controllers?
Yes, modern timers make integration simple. Many Wi-Fi-enabled controllers connect directly to your home network, allowing you to adjust watering schedules from your phone. Some even integrate with local weather stations, automatically skipping watering days if rain is forecast—making your automatic drip system even smarter.
Do Automatic Drip Systems Affect Soil Microbial Health Long-Term?
Managed correctly, they are excellent for soil health! By targeting the root zone, you promote deep root growth and encourage beneficial microbes in the soil profile. Over-watering can harm microbes, but because drip systems allow for precise soil moisture control, you can maintain the ideal damp (but not soggy) environment for a thriving soil microbiome year after year.
Are There Utility Rebates or Financial Incentives for Installing Drip Irrigation?
Absolutely worth checking! Because drip systems save so much potable water, many local water utilities offer rebates to offset the initial installation cost. Check your local water provider’s website for “water conservation rebates.” They often provide specific requirements, but saving 30–50% on your water bill makes the paperwork worthwhile.
Final Thoughts on Your Automated Raised Bed Garden
Switching to an automatic drip irrigation for raised beds setup fundamentally changes how you spend your gardening time. Instead of reacting to wilting leaves, you’re proactively optimizing soil moisture control.
Install it methodically, use that pressure regulator to protect your investment, and remember the maintenance routine: check those filters monthly. It’s about setting up a gentle, steady sip for your plants, not a sudden slosh.
You’ll save money on your water bill, you’ll save time, and most importantly, you’ll see healthier, happier harvests. Let the technology handle the mundane, so you can enjoy the rewards!


