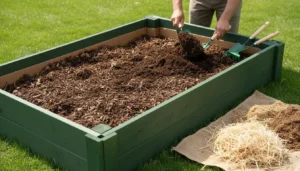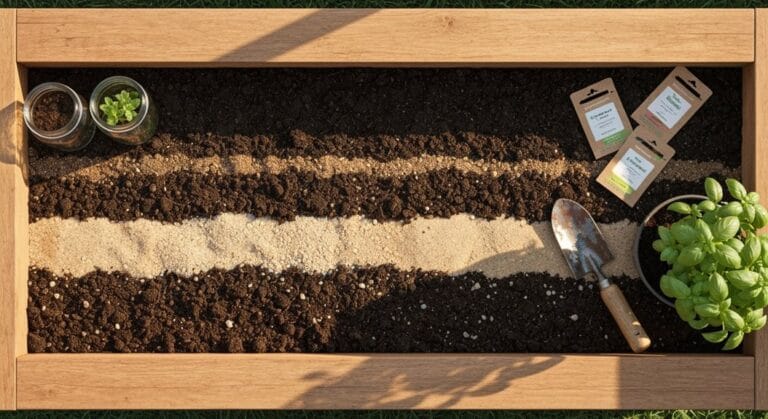

Welcome to the definitive guide on creating the perfect soil for your raised garden beds! If you’ve ever looked at a bag of potting mix and thought, “Can I do better than this?”, the answer is a resounding yes. Getting your raised bed soil mix ratio right is the single most impactful step you can take toward garden success.
The goal isn’t just to fill a box; it’s to build a thriving mini-ecosystem. We want soil that drains well when it rains but holds enough moisture for hot summer days. Plus, we’re aiming for loose, fluffy conditions so those hungry roots can spread out without a fight. Stick with us, and we’ll break down exactly what goes into that ideal blend.
Why Soil Mix Ratios Matter for Raised Beds
Why should you obsess over the exact percentages of topsoil, compost, and sand? Because what you mix determines whether your plants flourish or merely survive. Getting the balance right controls crucial factors like drainage and aeration.
If your mix is too sandy, water washes straight through, taking those precious nutrients with it. Too much clay or fine material, and you essentially create concrete once it dries, suffocating your roots. We need that sweet spot—a loose, fluffy texture that allows oxygen to reach the roots.
A balanced mix, like the popular 40/30/20/10 formula we’ll detail, also supercharges your soil biology. This encourages healthy microbial activity, which helps with nutrient mineralization—that slow, steady release of food your plants crave all season long.
Pro Tip: Don’t just mix it and forget it. Even the best initial blend needs attention. Test your soil periodically; soil testing is the best way to identify nutrient deficits before they become visible problems. After testing, tweak your compost and sand ratios in small 5–10% steps based on how the soil holds moisture.
Recommended Proven Ratios for Different Garden Goals
While there is a great baseline formula, different plants have different needs. You might need more aeration for root crops or higher nutrient density for tomatoes. It takes a little customization, but it’s worth the effort!
For general-purpose vegetable gardening, especially if you are filling entirely new beds, a simple tri-mix works wonders: aim for one-third native (or good quality) soil, one-third well-aged compost, and one-third peat moss or coconut coir (for water retention).
However, if you want the ultimate balanced profile, we recommend a slightly more complex mix for robust growth: approximately 40% topsoil, 30% compost, 20% coarse sand or grit, finishing with 10% organic boosters like worm castings or biochar.
- Heavy, Fruiting Crops (Tomatoes, Squash): Many gardeners swear by a variation of Mel’s Mix: 1/3 high-quality compost, 1/3 peat moss (or coir substitute), and 1/3 aeration amendment like vermiculite or perlite. These plants are heavy feeders!
- Root Crops (Carrots, Beets): These need excellent drainage and space. Stick close to the standard mix but add extra grit or perlite to ensure the soil is exceptionally loose.
If you are utilizing biochar—which is fantastic for boosting microbial habitat and long-term nutrient retention—consider adding about 10–20% by volume into your overall mix. Aiming for 25–50% organic matter overall is a great target for fertility.
Choosing and Testing Your Base Soil and Compost

Before you commit to hauling a yard of material, you need to know what you’re starting with. Do you have heavy clay underneath, or is your existing ground already sandy?
To properly assess your components, take several core samples (aim for 10–15 from a large bed) 6 to 8 inches deep. Mix these borings together well, air dry them, and send a cup off for professional testing. Testing helps you determine nutrient deficits, organic matter content, and especially the soil pH adjustment needed.
While you wait for lab results, you can manually check texture. If you squeeze a moist sample and it forms a hard ribbon, you have clay. If it feels distinctly gritty and won’t hold shape, it’s sand. You need to use your base soil to tailor your raised bed soil mix ratio.
And what about that compost? It should be dark, crumbly, and smell earthy—never sour or rotten. Mature compost means the nutrients are available to the plants right now.
Optional Amendments: When and How to Add Them
Amendments are the targeted treatments you apply once you know what the soil is missing from that test report. Think of them as personalized supplements.
For instance, if your report shows you are low on nitrogen, you might incorporate some well-aged composted manure. If your soil is compacting, you need bulky organic matter, like leaf mold, to improve soil structure and create aeration amendment channels.
When should you work these in? Generally, aim for once a year. Early spring, just before planting, is ideal, but fall preparation gives organic matter that crucial time to begin breaking down over winter.
- Timing: Amendments are best worked into the top 6–12 inches in the shoulder seasons (spring or fall).
- Exceptions: You can top-dress with finished compost anytime. Never use raw or fresh manure right before planting, as it can burn tender young roots.
- pH Control: Only use lime (to raise pH) or elemental sulfur (to lower pH) after a test dictates exactly how much you need.
For quick nutrient boosts in established beds, a thin layer of worm castings blended into the top one or two inches works wonders. Remember, using drip irrigation helps maintain the consistent moisture levels necessary for these biological amendments to function best.
Choosing Amendment Types Based on Need
Let’s match the amendment to the problem you are trying to solve, whether it’s drainage, biology, or nutrition.
Mushroom compost is excellent for increasing organic matter and boosting water retention in fast-draining beds. For fixing heavy clay, you need a coarser amendment like coarse sand, pumice, or perhaps added leaf mold to truly improve internal structure.
If biology is your focus, adding biochar (pre-charged with a little compost first!) creates wonderful habitat pockets for beneficial microbes. Worm castings and well-aged manures are your sources for easily accessible nitrogen and microbial food.
Mixing, Filling, and Maintaining Raised Bed Soil

Once you have your ingredients, you need to decide how to assemble them. You can use a layered approach—sometimes called “lasagna gardening”—or mix everything into one uniform blend from top to bottom. Layering saves money on initial fill, but a full mix ensures nutrients are evenly accessible, which is better for delicate seedlings.
For most common vegetables, aim for a finished soil depth between 12 and 18 inches. If you’re growing deep-rooted crops like potatoes or certain squash varieties, you might need 18 to 24 inches. Always calculate your volume (L x W x D) so you know exactly how much material to order!
Remember to leave space at the top. Don’t fill your bed right to the brim; leave 2–3 inches of headspace for mulch and settling over time.
Filling Depth and Volumes
The depth of your bed dictates how often you need to water and how vigorously your plants can grow. Deeper beds are much more forgiving during dry spells.
| Crop Type | Depth | Quick Tip |
|---|---|---|
| Shallow | 6–8″ | Herbs, lettuce |
| Medium | 12–18″ | Carrots, peppers |
| Deep | 18–24″ | Tomatoes, squash |
Annual Refresh and Amendments
Think of maintaining your raised bed soil as an annual tune-up. You don’t need to replace everything; you just need to refresh what was used up or broken down. The key here is knowing how often to amend raised bed soil annually.
Every year, remove spent plants, gently fork the top few inches, and incorporate 1 to 2 inches of high-quality, finished compost. This helps restore the organic matter. By adding this slowly, you encourage robust microbial life to stay active and healthy.
A crucial measure is to always check pH every year or two. If your test shows the pH creeping up or down past that ideal 6.0–7.0 range, apply necessary amendments like lime or sulfur very sparingly.
Adjusting pH and Nutrients Based on Soil Tests
We touched on this, but let’s be clear: guessing on pH is asking for trouble. You must test your soil before you start adding lime or sulfur willy-nilly. These amendments move slowly, and over-correcting can lock up essential nutrients.
If you want thriving raised beds, test the soil—don’t guess; pH, nutrients, and texture matter.
If your lab results show a low pH (too acidic), you’ll need lime (calcium carbonate). If it’s high (too alkaline), elemental sulfur is your friend. Always apply these in split doses over time, rather than dumping it all in at once. Remember, these adjusters take months to fully integrate and change the soil chemistry.
Also, pay close attention to the N-P-K numbers and micronutrient readings on your report. If iron is low, but your pH is high (which can hide iron availability), you might need to foliar feed to deliver that nutrient directly to the leaves.
Frequently Asked Questions
You’re all set now to build amazing soil that feeds your plants exceptionally well. Remember the foundational raised bed soil mix ratio, don’t skip testing that pH, and treat your beds to a light annual refresh, and you’ll see healthier yields than ever before!