


I spent three long years trying to make a garden thrive on a 20×20 slab of concrete, and let me tell you, it was humbling. My first attempt was a genuine disaster. I built a simple wooden frame, dumped in standard bagged potting soil, and watched it drain like the world’s fastest colander. By the middle of July, my tomatoes looked like tiny, sad raisins, and I was watering twice a day just to keep them alive.
But I learned. The crucial difference between total failure and abundant harvest often boils down to one simple thing: understanding the surface beneath your box. Are you building raised beds on concrete, or are you starting over tough grass? We need to prep that foundation properly.
I’m going to walk you through exactly what I messed up so you can skip my learning curve. Whether you’re dealing with paved surfaces or trying to suppress an aggressive lawn, this guide covers the essential raised garden bed preparation secrets I uncovered.
Site Selection & Preparation: The Foundation of Success
Before you even think about measuring your lumber or buying bags of soil, we have to scout the location. Think of this phase as the critical difference between throwing darts blindfolded and actually aiming for the bullseye. A great bed in a terrible spot is still a bad garden.
Get Your Sunlight Right
Most sun-loving vegetables and flowers demand a minimum of six consistent hours of direct sunlight daily. Do yourself a favor and track the shadows for a full day—morning, noon, and late afternoon. If you don’t get consistent sun, your plants will stretch themselves thin, look pale, and produce very little.
If a spot only gets four hours of sun, treat it as your shady zone. Save that real estate for shade-tolerant herbs like mint, parsley, or perhaps some leafy greens that prefer a cooler environment.
Test Your Drainage (It’s Crucial!)
This step is surprisingly easy, yet wildly important for your garden’s survival. Grab a hose and turn the water on to a slow trickle directly where you plan to place the box. Watch where the water goes.
If water pools up and sits for more than an hour or two, you’ve got a drainage problem that needs immediate addressing beneath the bed. If it soaks in quickly, that’s fantastic news! Note the direction of flow—this tells you where runoff water will travel away from your area.
Check for Level Ground
Once you’ve confirmed the light and water flow, set your empty bed frame on the ground. Place a long construction level across one of the major sides. You’ll need small wedges or thin pieces of scrap wood handy.
Lift the low end and gently slip a wedge underneath until the bubble sits perfectly in the middle. Check it both lengthwise and widthwise. Uneven beds cause water to pool heavily on one end, leading to saturated soil, wasting fertilizer, and putting unnecessary structural stress on the frame over time.
Building Raised Beds on Native Soil: The Ideal Path
If you are blessed enough to have actual native soil—the earth beneath your yard—you’re starting with what most serious gardeners consider a winning hand. This is the most natural environment for in-ground gardening, even when using a raised structure.
Prepare Your Foundation
Start simple: mow any existing grass or weeds down to one inch or less. Pull out any persistent, deep-rooted perennial weeds like thistle or thick dandelions right away. If the existing soil feels rock-hard and compacted, use a garden fork to gently loosen the top 6 to 8 inches. Remember, we aren’t turning the whole structure over; we just want to give new roots a fighting chance.
Cardboard: Your Secret (and Decomposable) Weapon
Here’s where we handle any lingering weeds without toxic chemicals. Lay down sheets of plain, uncoated cardboard—or use about 10 overlapping layers of newspaper—directly on the prepared ground. Then, use a few inches of compost or topsoil to weigh it down so the wind doesn’t carry it off.
The cardboard is amazing because it smothers everything underneath, eventually breaks down completely, and turns into valuable organic matter for the soil microbes. Always overlap the edges by at least six inches so stubborn invaders can’t sneak through the seams.
Raised Bed Depth Requirements
When you are dealing with any hard surface, whether it’s compacted soil or pavement, depth matters hugely. Always aim for a minimum depth of 18 inches for most common vegetables. While herbs and lettuce can manage fine in 12-inch beds, the deeper structure supports robust root systems.
Since your roots can’t push further down, that 18-to-the-24-inch sweet spot ensures moisture retention and healthy growth. If you plan on growing deep root vegetables like carrots or potatoes, go as deep as your frame allows!
The Golden Soil Recipe
When you go to fill these beds, using what I call the 40-40-20 ratio delivers excellent results. This means 40% high-quality compost, 40% good topsoil, and 20% of an amendment like coarse sand or perlite (for aeration). This blend provides the immediate nutrients while ensuring the raised bed drainage solutions are effective.
- 40% Compost (Nutrients & Health)
- 40% Purchased Topsoil (Bulk & Structure)
- 20% Aeration (Perlite or Coarse Sand)
Constructing Over Lawn: From Grass to Garden
Converting a grassy area into a garden spot is a common challenge, but it is absolutely achievable if you focus on smothering the existing turf. Digging out sod is exhausting work, so let nature do the heavy lifting via suffocation.
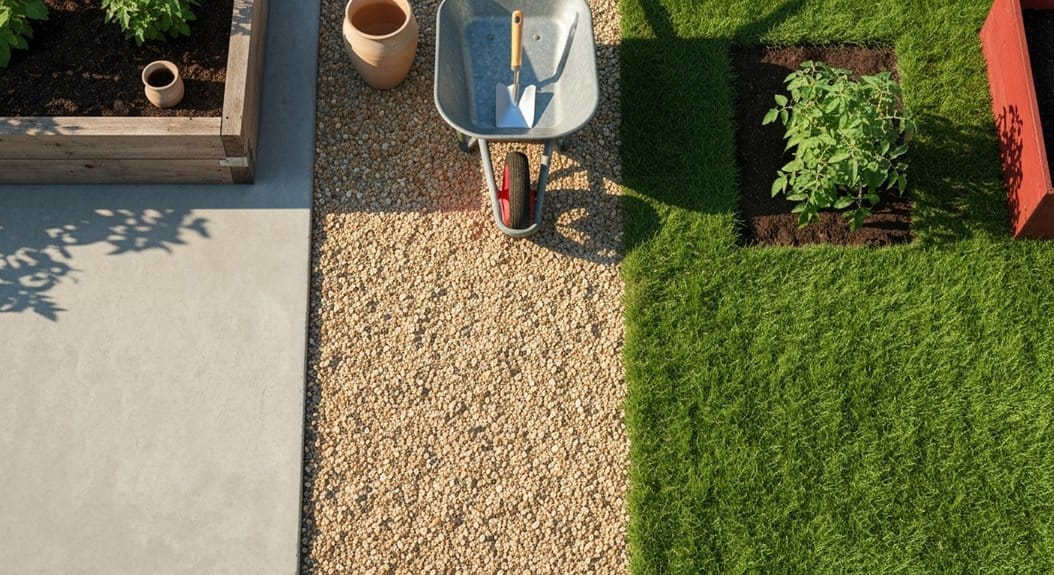
The Smother Method (Cardboard is King)
If you are replacing grass, start by mowing that area as tight as you possibly can. Then, lay down heavy, plain cardboard directly onto the stubble. If you don’t have cardboard, use at least 10 sheets of newspaper to create a light-blocking barrier.
The thicker the barrier, the better it kills the grass. Once the cardboard is down, wet it thoroughly so it lies flat and stays put while you pile on your first few inches of compost on top.
- Mow the lawn as short as possible (under 1 inch).
- Lay down overlapping cardboard directly onto the remaining grass.
- Wet the cardboard thoroughly to anchor it down.
- Pile on compost and then topsoil.
- If time allows, let this settle for two to three weeks before planting.
If you are worried about burrowing critters like voles, this is also the time to secure hardware cloth (metal mesh) to the bottom of your bed frame before placing it down. Then, add the cardboard layer on top of the hardware cloth.
Installing on Concrete or Pavement: The Game-Changer
When tackling how to start a garden on pavement, my personal experience proves that this setup is totally viable. Yes, setting up raised beds on asphalt or concrete is safe, but only because we are creating a necessary buffer layer underneath the soil to manage water flow.
The enemy here isn’t the concrete itself; it’s the fact that concrete prevents any water that runs through your soil from ever sinking into the ground. This leads directly to our most important topic: drainage.
The Essential Drainage Layer: Gravel and Geotextile
For concrete setups, a drainage base is not optional—it’s your insurance policy. You need a layer of coarse material at the very bottom, like pea gravel or stones, at least 3 to 4 inches deep. This creates a void space for excess water to collect temporarily before evaporating or draining out the bottom of the frame.
Once the gravel is laid, cover it completely with a sheet of geotextile fabric (sometimes called landscape fabric). This fabric is key: it lets water pass through easily but stops your fine soil particles from washing down and clogging up that nice gravel layer beneath it.
Dealing with Heat on Pavement
Here is the harsh reality of raised garden beds on concrete: Concrete absorbs and radiates massive amounts of heat, especially when sitting in direct summer sunlight. This means the soil inside your bed will dry out significantly faster than if it were sitting on cool earth.
Expect to water more frequently when growing on pavement, sometimes daily during peak summer heat. A thick layer of organic mulch on top of your soil acts as insulation, significantly helping to regulate these soil temperatures and prevent heat stress on your tomato roots.
Soil Mix for Concrete Beds: Moisture Retention is Key
Because of the rapid drying situation, the soil mix for concrete beds needs to lean slightly toward moisture retention compared to beds placed directly on the ground. We still need aeration, but we need more structure.
Try swapping the general recipe for this one: 50% high-quality compost, 30% topsoil, and 20% perlite. The extra compost helps hold the moisture where the roots need it.
Essential Drainage: The Difference Between Thriving & Drowning
Let’s take a deep dive into effective raised bed drainage solutions, because poor drainage leads directly to sickly plants, root rot, and major disappointment. A foundational base dictates how well your entire growing season goes.

If you’re building on concrete or a naturally low area, we combine forces: gravel for flow, fabric to separate. This creates a robust sub-base where water can move freely away from active root zones.
Layering for Complex Sites
For situations where you suspect drainage is inherently poor—like a patch of clay soil sitting on top of hardpan, or any placement on concrete—stacking your base layers provides total security:
- Gravel layer (3–4 inches thick): This is your primary water channel.
- Geotextile fabric: Lay this over the gravel to stop soil from sinking down.
- Coarse Compost/Chips (Optional 2 inches): Helps build soil biology immediately.
- Quality Soil Mix: Your desired 12–18+ inches of planting medium.
Address Structural Drainage
If your frame is made of wood or plastic and has solid sides all the way around, you need to manually add exit points for water. Drill 1/2-inch drainage holes about every 6 to 8 inches along the bottom edge of the sides of your structure. This allows water trapped on the plastic liner (if you used one) or trapped near the frame bottom to escape horizontally.
For very long beds, say over 10 feet, consider introducing a very slight slope—maybe a 1 or 2-degree tilt across the length. This encourages consistent water movement toward the lowest drainage point, preventing a soggy middle section.
Maintenance & Long-Term Care by Surface Type
Once your bed is built, the maintenance required slightly changes based on what’s underneath it. The goal is always to manage moisture consistently.
Watering: The Concrete Challenge Revisited
As we established, a bed sitting directly on heat-retaining concrete will evaporate moisture faster than those sitting on soil. Think of it like container gardening—it dries out quickly. Plan on watering raised beds on concrete vs soil needs in advance, potentially requiring daily attention during 90-degree weather.
Conversely, beds sitting directly on soil or lawn will retain moisture better. During peak season, aim to water those 2 to 3 times per week, or whenever the top inch of soil feels dry to the touch.
Annual Amendments
Every year, especially in the spring, refresh your beds by adding 2 to 3 inches of fresh compost or a mix of compost and aged manure. This constant replenishing feeds the soil biome and replaces what your plants pull out. This is especially important for beds sitting on inert concrete.
Pest & Weed Differences
Your surface dictates which pests you’ll see less of. On concrete or pavement, you usually won’t have issues with burrowers like moles or gophers—hallelujah! However, slugs, snails, and beetles can still find their way in easily.
If you built over lawn, you need to watch the edges where the cardboard barrier meets the frame; grass runners are persistent and can sometimes creep in if not lined properly.
| Season | Soil (Native) | Lawn (Smothered) | Concrete/Pavement |
|---|---|---|---|
| Spring | Loosen top 2–3″, add compost | Check for grass creep, amend heavily | Top off soil, refresh landscape fabric barrier |
| Summer | Mulch heavily, water 2–3×/week | Water as needed, check edges | Water daily in heat, monitor soil temperature |
| Fall | Add leaf mold, cut back plants | Prep for winter coverage/weeds | Top-dress base layer, protect frame from frost cycles |
| Winter | Minimal work (region dependent) | Suppress any remaining growth | Ensure drainage holes are clear of snow/ice |
FAQs: Solving Common Raised Bed Dilemmas
Q: How deep do I really need to go when building raised garden beds on top of hard surfaces?
A: The honest answer is, the deeper, the better for productivity. While you can get short greens to grow in a 12-inch bed, for most vegetables (tomatoes, squash, beans), you should aim for 18 inches of actual soil depth. This depth is critical for moisture stability and healthy root structure when the roots can’t access the ground below.
Q: Is landscape fabric or weed cloth necessary when building raised beds on concrete?
A: On clean concrete where the primary goal is protection and drainage, geotextile fabric is essential to separate the gravel base from the soil. However, if you are building directly on soil or grass, landscape fabric is often unnecessary or even counterproductive. It prevents beneficial soil organisms from moving freely and the pores can sometimes clog, hindering drainage over many years.
Q: How do I address the cost analysis of preparing concrete vs. lawn for a raised bed?
A: Preparing concrete usually involves upfront costs for materials like 4–6 inches of gravel and quality geotextile fabric, plus hauling in 18 inches of specialized soil mix, which can be expensive. Preparing a lawn area often has lower material costs (free cardboard!), but might demand more physical effort if you need to vigorously remove existing sod or stubborn weeds before layering begins.
Q: Can I move a raised bed once it’s full of soil?
A: Technically, yes, but practically, no—unless you plan on emptying it first! A full 4×8 foot bed that is 2 feet deep can easily weigh over 800 pounds. If you anticipate needing mobility, build a reinforced frame that sits on heavy-duty casters or a furniture dolly before you add materials. Otherwise, choose your final spot very carefully.
Q: My concrete slab has large cracks. Can I still build my raised bed on it?
A: You can proceed with caution. Severely cracked or uneven concrete can lead to structural instability and water pooling in low spots. If the cracks are minor, the 4-inch gravel base we recommend for building raised beds on concrete will often successfully level the surface out for you. If the cracks are deep or wide, you might need to reinforce the area with patio blocks before placing your bed frame.


