


Think raised beds must be deep to grow amazing flowers? I used to think so, too! But I’m here to tell you that it’s not about the depth; it’s about the prep work. I’m going to walk you through a bold, 8-step preparation plan that lets your flowers thrive even with modest soil depth—and we’ll cover the surprising, crucial step that almost every gardener forgets.
Key Takeaways (The Flower Bed Blueprint)
- Location is Everything: Choose a sunny spot with at least 6 hours of morning sun. Keep the bed 18–24 inches away from hot masonry walls.
- Build Smart: Use rot-resistant materials like cedar or galvanized steel. Always check for square as you assemble the frame.
- The Hugelkultur Secret: Consider adding a 6–12 inch layer of buried logs (hugelkultur) at the bottom. It acts like a sponge and a slow-release fertilizer!
- Layering is Key: Fill the bed in 4–5 inch “lifts” (layers), moistening and lightly tamping each one to prevent settling.
- The Soil Mix: Aim for a 1:1 mix of quality topsoil and finished compost for most flowers.
- Depth: 6–12 inches of finished soil is enough for most flowers. Go for 12–18 inches if you plan on growing root crops.
- Replenish: Add 1–3 inches of fresh compost every year to keep the soil happy.
Select Location & Level Ground
Where should you put your raised bed so it actually grows flowers instead of excuses? The location is the first, and arguably most important, decision you’ll make.
Place your bed where it gets at least 6 hours of direct light, preferably morning sun. I always map the sun and shade across the seasons so I know exactly what I’m working with.
Put your bed where it gets at least 6 hours of direct morning sun; map sun and shade seasonally.
Also, keep your bed at least 18–24 inches away from any south or west-facing masonry. Those walls reflect heat like crazy, and that intense heat can fry your flowers!
Finally, pick relatively level ground. If your bed is on a slope, the water will run to one side, leading to uneven watering and thirsty plants. Stay near a water source, too—your future self will thank you for the easy access.
Build or Assemble Raised Bed Structure
Choosing the right materials and getting your pieces prepped before you start will save you hours (and a lot of swearing) later—trust me on this one.
Raised beds are just elevated garden plots. They help immensely with drainage and soil control. You’ll want to pick a rot-resistant material like cedar, galvanized steel, composite, or recycled plastic. Please, avoid old arsenic-treated wood!
Measure your boards, drill pilot holes, and use corrosion-resistant screws. As you assemble, make sure the frame is square—a helper makes this much easier for large beds!
Clear and Prepare Base Area
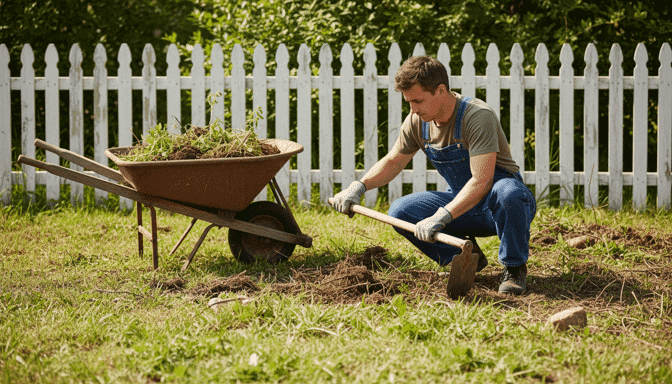
Start by stripping away all the grass, weeds, and roots from the footprint of your bed. You don’t want anything coming back to haunt you after the first season!
Use a sharp spade or hoe to remove the sod. Pull those roots out aggressively, then level and tamp the area to create a steady base.
Next, loosen the native soil about 8 inches deep. This improves aeration—which is just creating air spaces for the roots—and helps with drainage. Remove any large rocks or debris that could cause uneven watering.
| Step | Tool | Time |
|---|---|---|
| Remove vegetation | Spade | 30–60 min |
| Level base | Rake | 15–30 min |
| Loosen soil | Fork | 20–40 min |
Line the Bottom (Optional)
You can skip lining the bottom of a raised bed, but a simple liner pays off big time if you want cleaner soil, fewer weeds, or protection from burrowing pests.
I choose between a breathable fabric or a short-term biodegradable liner like cardboard. Cardboard is great because it breaks down and feeds the soil life.
Avoid plastic! It traps moisture and harms soil life. If gophers are an issue where you live, install hardware cloth (metal mesh) for protection.
Add Hugelkultur or Coarse Organic Base Layer

Want to increase fertility and water-holding capacity in your raised bed? Try hugelkultur—it’s basically a coarse organic base layer of logs, branches, and leaves that slowly feeds your plants and acts like a giant sponge.
Choose mostly hardwood logs (avoid black walnut or old-growth redwood). Bury a 6–12 inch layer of coarse wood in the bottom of the bed.
This technique is amazing because it’s low-maintenance, sequesters carbon, and once it’s settled, you’ll be watering far less. It’s a little upfront effort for years of payoff!
Add Organic Matter (Compost Layer)
Now for the good stuff! Add a 1–3 inch layer of mature compost on top of your base layer before you start filling with soil.
Mature compost is dark, crumbly, and smells earthy—not hot or sour. It provides a gentle, steady buffet of nutrients (N, P, K) for young roots without shocking them.
Compost also increases moisture retention and feeds the helpful microbes that keep your soil healthy. Spread it evenly; you don’t even need to mix it in deeply.
Add Soil Layer
When you fill the bed, aim for a balanced mix. I use roughly a 1:1 volume mix—half quality topsoil, half finished compost. You can also use a 1:1:1 ratio, adding a part of potting mix for extra lightness and drainage.
This balance ensures roots get both food and the drainage they need. We don’t want the soil to turn into mud!
Add the soil in 4–5 inch increments (or “lifts”). Moisten and lightly tamp each layer as you go. This prevents the soil from settling too much later on, which can leave your plants looking sunken.
| Feature | Why it matters |
|---|---|
| Color | Indicates organic matter |
| Texture | Drainage and aeration |
| Nutrients | Bloom potential |
| Cleanliness | Safety |
| Certification | Verified quality |
Fill, Tamp, and Level
You are almost there! Finish filling the bed to a final depth of about 6–12 inches for most flowers. If you’re planting root crops, aim for 12–18 inches.
Leave 1–2 inches of space below the rim. This is crucial—it gives you a watering reservoir so water doesn’t immediately spill over the sides when you irrigate.
Gently press each layer using your hands or a flat board to remove large air pockets. Use a light tamping technique—firm, repeated pats—not heavy compaction. Finally, check the level with a straight board and correct any low spots. Now you’re ready to plant!
Frequently Asked Questions
When Should I Start Planting After Filling the Bed?
Start planting several weeks after filling, once soil readiness is confirmed — usually two to four weeks in spring or after autumn settling; your seed timing should favor annuals initially, so you’ll help others enjoy reliable, beautiful blooms.
How Often Should I Water Newly Planted Flowers?
Water newly planted flowers daily the initial week, then taper to two to three times weekly in week two, shifting to weekly soaks; use Drip irrigation, Mulching techniques, and you’ll nurture plants to serve others.
What Flowers Perform Best in Raised Beds in My Climate?
Choose cold hardy poppies, black eyed Susans, zinnias, and daylilies in cool zones, or dahlias, marigolds, and butterfly bush in warm zones; match soil compatibility and sun exposure so you’ll provide beautiful blooms for neighbors.
How Do I Prevent Pests and Diseases in Raised Beds?
Prevent pests and diseases by rotating crops, inspecting, removing diseased material, encouraging beneficial insects with insectary plants, applying mulching strategies to retain moisture and suppress weeds, don’t forget barriers, and sharing tips to serve neighbors.
Do Raised Beds Require Seasonal Maintenance or Winterizing?
Batten down the hatches—you should perform seasonal maintenance and use winterizing methods to protect beds, remove diseased foliage, mulch, and plan compost timing; you’ll help future gardeners and serve your community well with patient care.
Conclusion
You did it! You picked the perfect location, prepped the plot, and packed in layers for thriving blooms. You chose the right soil, set a sturdy frame, and maybe even added a hugelkultur base to hold moisture.
Now, all that’s left is to water wisely, weed weekly, and watch those roots reach. Plant with patience; prune with play. Your bed is a bright, bountiful blank canvas—tend it a little each week, and it will return the favor with beautiful flowers and easy smiles. Trust the process, and enjoy your garden!


