
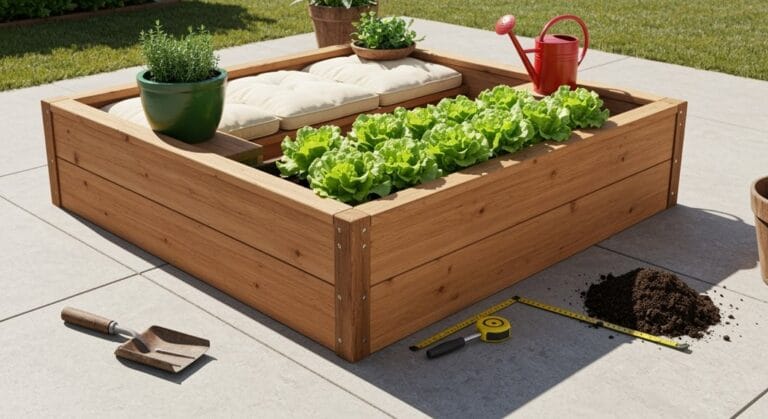

Do you dream of fresh tomatoes and herbs, but the only open space you have is a hard, unyielding concrete patio? I completely get it. Concrete jungles don’t exactly scream “prime gardening territory,” but I’m here to tell you that you absolutely can create lush, productive soil beds right on top of that slab.
If you’re planning on building raised beds on concrete, we need to talk about one single, crucial factor that determines success: drainage. When you bypass the earth’s natural ability to filter water, you have to engineer your own excellent system underneath the bed.
This guide will walk you through exactly how to build a raised bed on concrete patio that is productive, healthy, and won’t damage your existing surface. Let’s get those veggies growing!
Laying the Foundation for Successful Concrete Patio Gardening
- Aim for height! Beds between 24 to 32 inches are wonderful for your back. Choose materials like cedar lumber or sturdy metal kits for longevity.
- Location matters. Find a spot receiving 6–8 hours of direct sun daily. You need 1–2 feet of clear access space around the perimeter for maintenance.
- Always lift the frame off the concrete using pavers or concrete blocks underneath. This small step encourages vital airflow and stops moisture trapping.
- Master the base layer: Start with 2–3 inches of angular gravel, then cover that with breathable geotextile fabric to keep soil separate from the drainage layer.
- Soil composition is key. A rich blend, like a soil mix 60/40 compost ratio, provides the aeration and long-term fertility needed for container gardening.
Placement Perfection: Location and Size Stability on Your Patio
Before you start measuring, scouting the perfect location for your raised garden bed on concrete is essential. Think of this as setting up a specialized micro-climate right on your patio.
For vegetables to truly thrive, consistent sunlight is non-negotiable—aim for a solid six to eight hours daily. You’ll want to observe your potential spot throughout a sunny day to confirm this timing works for your desired crops.
When deciding on width, I always advise keeping beds under three feet wide. Why this magic number? Because you should never have to compact the excellent soil in the middle by stepping on it while you garden. If you can comfortably reach the center, your roots will thank you for the breathing room.
Height is largely about ergonomics, but 24 to 32 inches is widely considered the sweet spot for easy access. Just remember the trade-off: Taller beds naturally mean a higher expenditure because you are buying a greater volume of soil to fill them up properly.
Finally, ensure you leave a comfortable 1-to-2-foot buffer zone around all sides of the bed. This space is critical for necessary tasks like watering, weeding, and navigating around those burgeoning squash plants without frustration.
Selecting Smart Materials for Your DIY Raised Bed on Concrete Patio
Since concrete is completely impermeable—meaning it won’t naturally wick away excess moisture like native earth—the materials you select for your frame directly impact how long your bed will last.
For wood builds, naturally rot-resistant options are your best friends. I highly recommend cedar lumber or redwood. If you prefer a maintenance-free look, galvanized steel or composite siding are excellent choices.
When assembling, always use stainless steel or galvanized hardware to prevent ugly rust streaks from setting up permanent stains on your beautiful patio surface. Nobody wants that!
Don’t forget the supporting layers! You need heavy-duty drainage filler—like coarse gravel or expanded shale—and that absolutely vital breathable geotextile fabric liner.
The real magic, though, is the growing medium. Skip heavy native topsoil, which always compacts too fast in confined spaces. For the best performance, aim for a custom blend: roughly 60% high-quality garden soil mixed with 40% rich, fluffy compost. This combination provides necessary structure and endless nutrients for your vegetables.
Building a Strong Frame for Raised Beds on Concrete
When you build a raised bed on concrete, you must engineer for structural stability differently than you would on bare earth. Because the base is hard and flat, the walls must be robust enough to handle the enormous outward pressure of saturated soil.
Using thick boards, like 2×6 or 2×8 lumber, works great for the frame structure. Assemble the corners tightly using high-quality screws, and seriously consider adding metal L-brackets for reinforcement. These prevent the sides from bowing out dramatically when they are weight-loaded with soil.
Here is my favorite structural tip for raised beds on concrete: Never let the wood sit directly against the concrete. Set the very bottom edges of your frame onto concrete pavers or rot-resistant blocks. This lifts the box completely, guaranteeing that crucial air gap underneath, allowing moisture to evaporate and protecting your wood.
Using Cross-Bracing for Long-Term Stability
If your bed runs any longer than about four feet, internal support beams are non-negotiable. Think of these as the horizontal ribs of your structure. You’ll want to install cross-bracing beams that run perpendicular to the longest sides, spaced roughly every 18 to 24 inches apart.
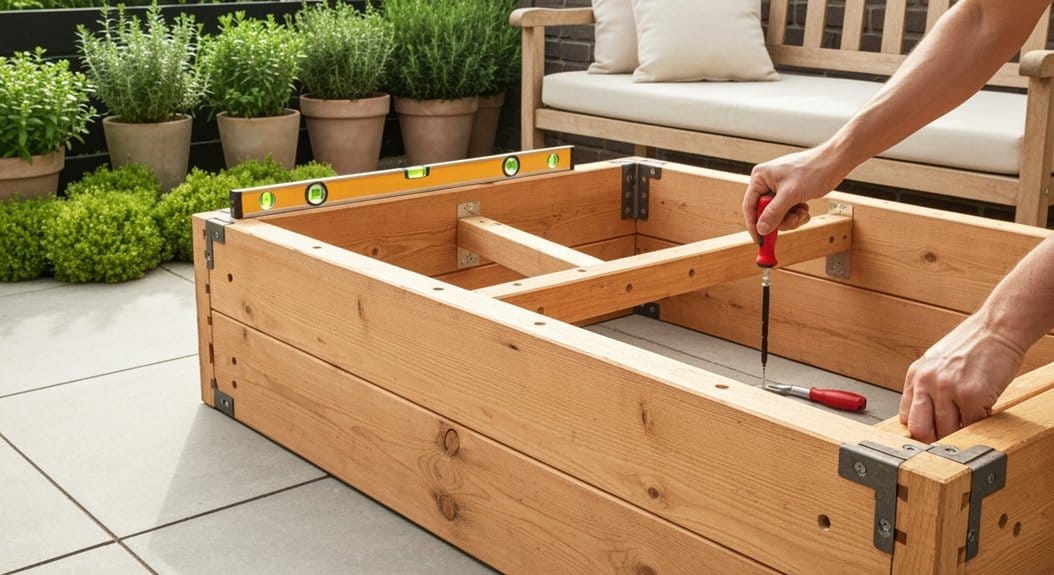
Make sure these braces sit perfectly flush with the bottom edge of the frame pieces. This simple detail ensures the entire structure sits securely and evenly atop those foundation support blocks you placed earlier.
The Crux: Achieving Best Drainage for Raised Beds on Concrete
This specific step is what separates a thriving planter from a slow, soggy failure. We must absolutely prevent standing water underneath the bed, which can lead to root rot or potentially damage your concrete over time.
Start right on the concrete slab. Spread out a generous 2- to 3-inch layer of angular material, like coarse gravel or expanded shale, across the entire footprint of where the bed will sit. This acts as your primary evacuation channel for excess water.
Next comes the protective liner. You must line the entire interior—the base and all four sides—with breathable geotextile fabric. This fabric is brilliant: it holds your valuable soil mix in place while allowing water to pass freely. Never—and I mean never—use solid plastic sheeting; that just turns your raised bed into a very decorative bathtub!
| Layer Applied To | Recommended Material | Purpose |
|---|---|---|
| Concrete Patio Surface | Gravel or Expanded Shale (2–3″ deep) | Creates the primary water channel |
| Inside Walls & Bottom | Geotextile Fabric | Stops soil migration while draining quickly |
| Frame Base | Pavers or Concrete Blocks | Lifts wood off the surface for airflow |
Because concrete reflects heat and drains differently than the ground, you must always monitor soil moisture levels closely. While drainage is key, raised beds on concrete can sometimes dry out surprisingly fast, especially if you have direct afternoon sun reflecting off the slab.
Insulating Raised Beds on Hot Pavement and Filling for Yield
Now for the rewarding part! After your structure is solid and the drainage base is set, we fill thoughtfully to minimize future settling. Regarding the heat gap we discussed, some experts suggest adding a thin leveling layer of masonry sand (about 1 inch) over the gravel—this is optional but helps create a perfectly flat foundation while adding a small buffer against intense heat transfer.
Then comes the growing medium. Fill using that custom blend we discussed—that 60% garden soil to 40% compost is ideal. This ratio promotes excellent aeration, which is even more critical when you are gardening in a restricted container space like a patio bed.
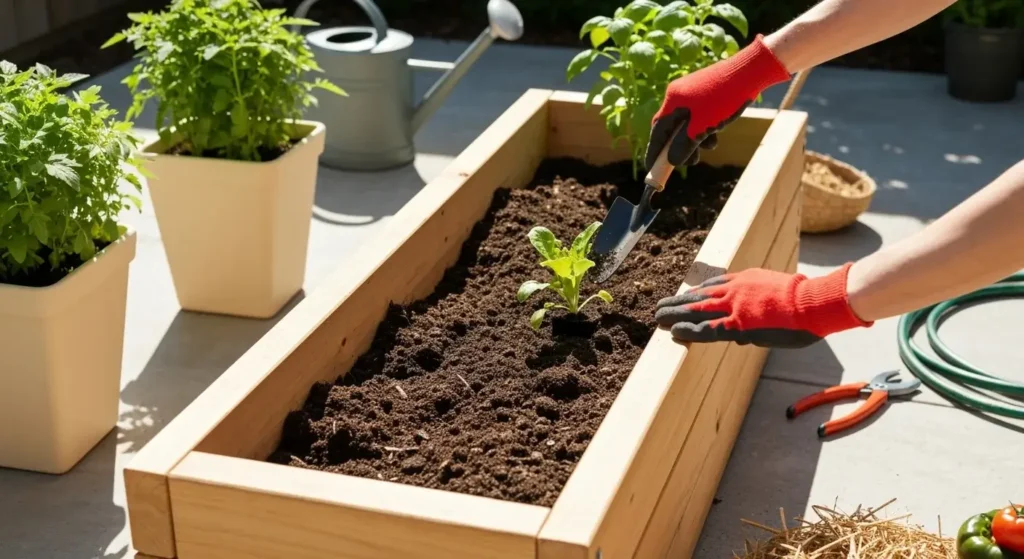
When watering, I always recommend aiming for deep, thorough soakings less frequently, rather than a light sprinkle every day. This encourages your roots to develop strongly and grow deep into that rich soil zone, giving them the best chance to fight off midday heat stress.
As part of your routine maintenance, always finish with a thick layer of organic mulch on top. Mulch conserves precious moisture, helps regulate soil temperature, and keeps weeds down. A quick inspection of the base support blocks a couple of times a year confirms that airflow is clear underneath.
Cost Comparison: DIY vs. Kit for Raised Beds on Concrete
When budgeting for this project, it’s wise to weigh the cost of materials against the convenience of assembly. Buying a pre-made kit—whether it’s plastic or a nice metal kit for raised beds on concrete—is certainly faster off the bat.
However, kits often come with a significant price tag. A standard 4×8 metal kit might run you $250 to $400 before you even purchase the actual soil needed to fill it.
Building a comparable DIY bed using quality lumber, appropriate screws, and base pavers might keep your frame construction cost closer to $150–$200. But here is the ultimate truth check: the frame is usually the cheapest part of this whole endeavor!
The largest single cost item in any estimate for raised beds on concrete will always be the sheer volume of high-quality soil and compost required to purchase and haul into the volume.
Practical Off-Season Care: Winterizing a Raised Bed on Concrete
Because concrete is such a fantastic thermal conductor, it transfers cold easily. This means your soil mass can freeze solid much faster than garden beds sitting directly on insulating earth. Therefore, diligent winter care is important if you garden late into the year.
Start your winterizing by clearing out all spent annuals and debris promptly. Then, pile on 4 to 6 extra inches of dry insulation—think straw, shredded leaves, or wood chips. This insulating blanket layer shields the roots from the intense cold radiated up from the patio beneath.
Crucially, ensure the gravel drainage layer underneath your bed is completely free of any fallen debris that could block water flow during unpredictable freeze-thaw cycles. In very cold climates, adding temporary frost blankets over any delicate items saves them from chilling!
Frequently Asked Questions (FAQs) About Concrete Patio Gardening
Will Raised Beds Stain Concrete Patio Slabs?
They certainly can if you aren’t proactive about airflow! Persistent dampness where wood touches concrete encourages mildew growth or, over a long time, can cause minor surface deterioration. This is precisely why lifting the frame onto solid, non-porous pavers or blocks is non-negotiable—that air gap keeps the base dry and actively protects your patio investment.
How Do I Prevent Heat Reflection from the Concrete Surface?
Concrete absorbs and radiates significant heat upwards, potentially stressing roots or drying out lower soil layers too fast, especially in summer. The multi-layered approach helps mitigate this: First, lift the bed using pavers. Second, use a deep layer of aggregate (gravel). Third, always maintain a thick layer of organic mulch on the soil surface. The mulch acts as a buffer, slowing down the upward heat transfer from both the air and the slab below.
Which Material Holds the Most Heat on a Hot Patio? Metal vs. Wood?
Metal kits will heat up and cool down the fastest—they retain less ambient heat than a dense block of wood, but they transfer intense summer heat into the soil very quickly. Cedar or composite materials provide better insulation against the radiant heat coming off the slab. If you choose metal, monitor watering closely in mid-summer, as the soil near the edges can become dangerously hot.
How Much Weight Can My Patio Concrete Safely Support?
This is a smart, responsible question to ask! Most standard residential concrete patio slabs (usually 4 inches thick) are engineered to handle loads in the thousands of pounds per square foot. A heavy, fully saturated raised bed rarely exceeds more than 100 pounds per square foot concentrated in one spot. You should be safe, but if you plan on building several very large beds, positioning them strategically over existing patio joints is a good idea to help spread the load widely.
What is the Minimum Required Bed Depth for Common Vegetables on Concrete?
This is a great long-tail concern! For shallow-rooted crops like lettuce, greens, and most herbs, 8 to 12 inches of soil depth is usually fine. However, for productive root crops like carrots, beets, or heavy feeders like tomatoes and peppers, I strongly recommend aiming for a total soil depth of at least 18 inches, if not the full 24 inches, to give those root systems the space they need to flourish in container conditions.
Conclusion: Your Concrete Oasis Awaits
Creating a vibrant garden space directly on a concrete slab isn’t just some lofty gardening fantasy; it’s completely achievable when you apply the right building science for raised beds on concrete.
The entire success of your project truly hinges on mastering three core areas: choosing smart, rot-resistant materials (like high-quality cedar lumber), ensuring a solid structure with proper cross-bracing, and critically, perfecting that drainage system underneath.
If you invest the upfront time to elevate the frame and meticulously lay that gravel and fabric base, you are setting yourself up for years of easy-access concrete patio gardening and wonderful harvests right outside your door.


